
In addition to the Docker image for 23c Free, they have also made available a Virtual Machine (VM) which you can import into VirtualBox. The steps outlined below are what you need to follow to complete this installation/setup of the VM. This also assumes you have installed VirtualBox.
The first thing you need to do is download the VM image. Download it from here.
The VM is a great way to play with 23c Free, as the VM also comes with other tools and features. These include; port forwarding is already setup, various schemas are setup, tools like SQLcl, APEX and REST are installed and setup for you. You’ll need 4G RAM available to run the VM on top of every thing else on your computer, so you’ll probably need a computer with a minimum of 8G RAM, plus another 20G of disk space for downloading the image and for the installation.
To Import the image File -> Import Appliance to launch Appliance Import Wizard. Then select the downloaded file from the file system. There isn’t much else to do, except to reset the network adaptors. The images below outline the steps to follow.
1 – Open VitualBox, Import the image File -> Import Appliance to launch Appliance Import Wizard
2 – Locate the image on the file system
3 – Change the MAC address policy – select this field
4 – Change policy to Generate new MAC addresses

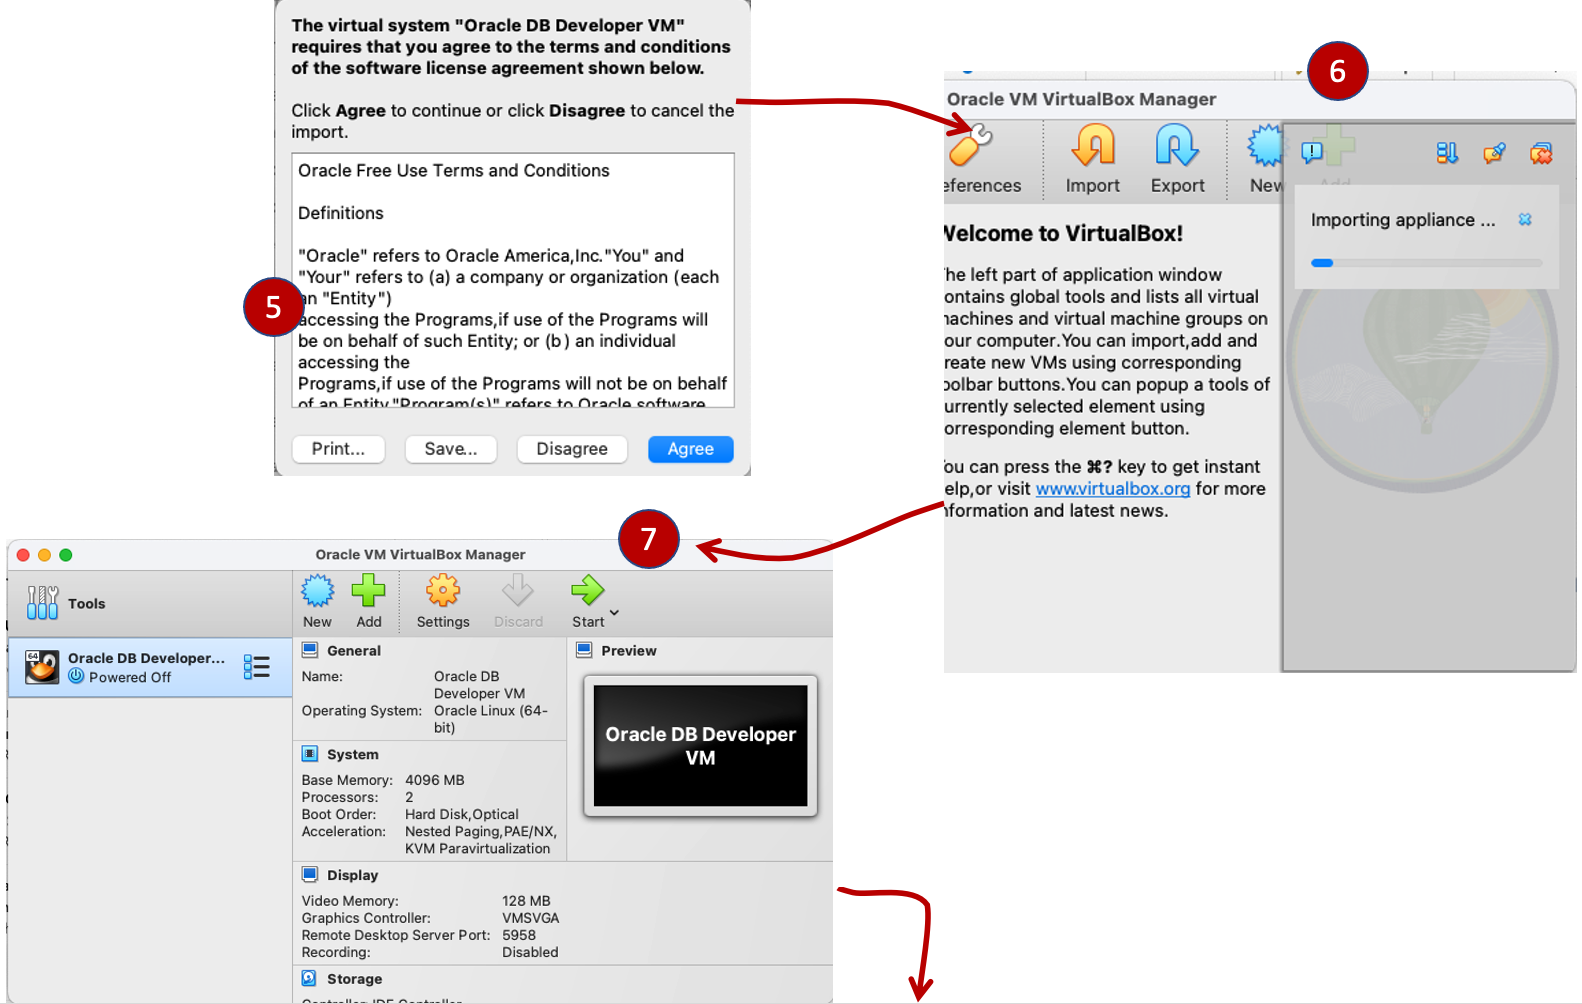
5 – Agree to the Terms and Conditions
6 – The import will start and the progress bar will be displayed
7 – Import has completed and the VM is listed
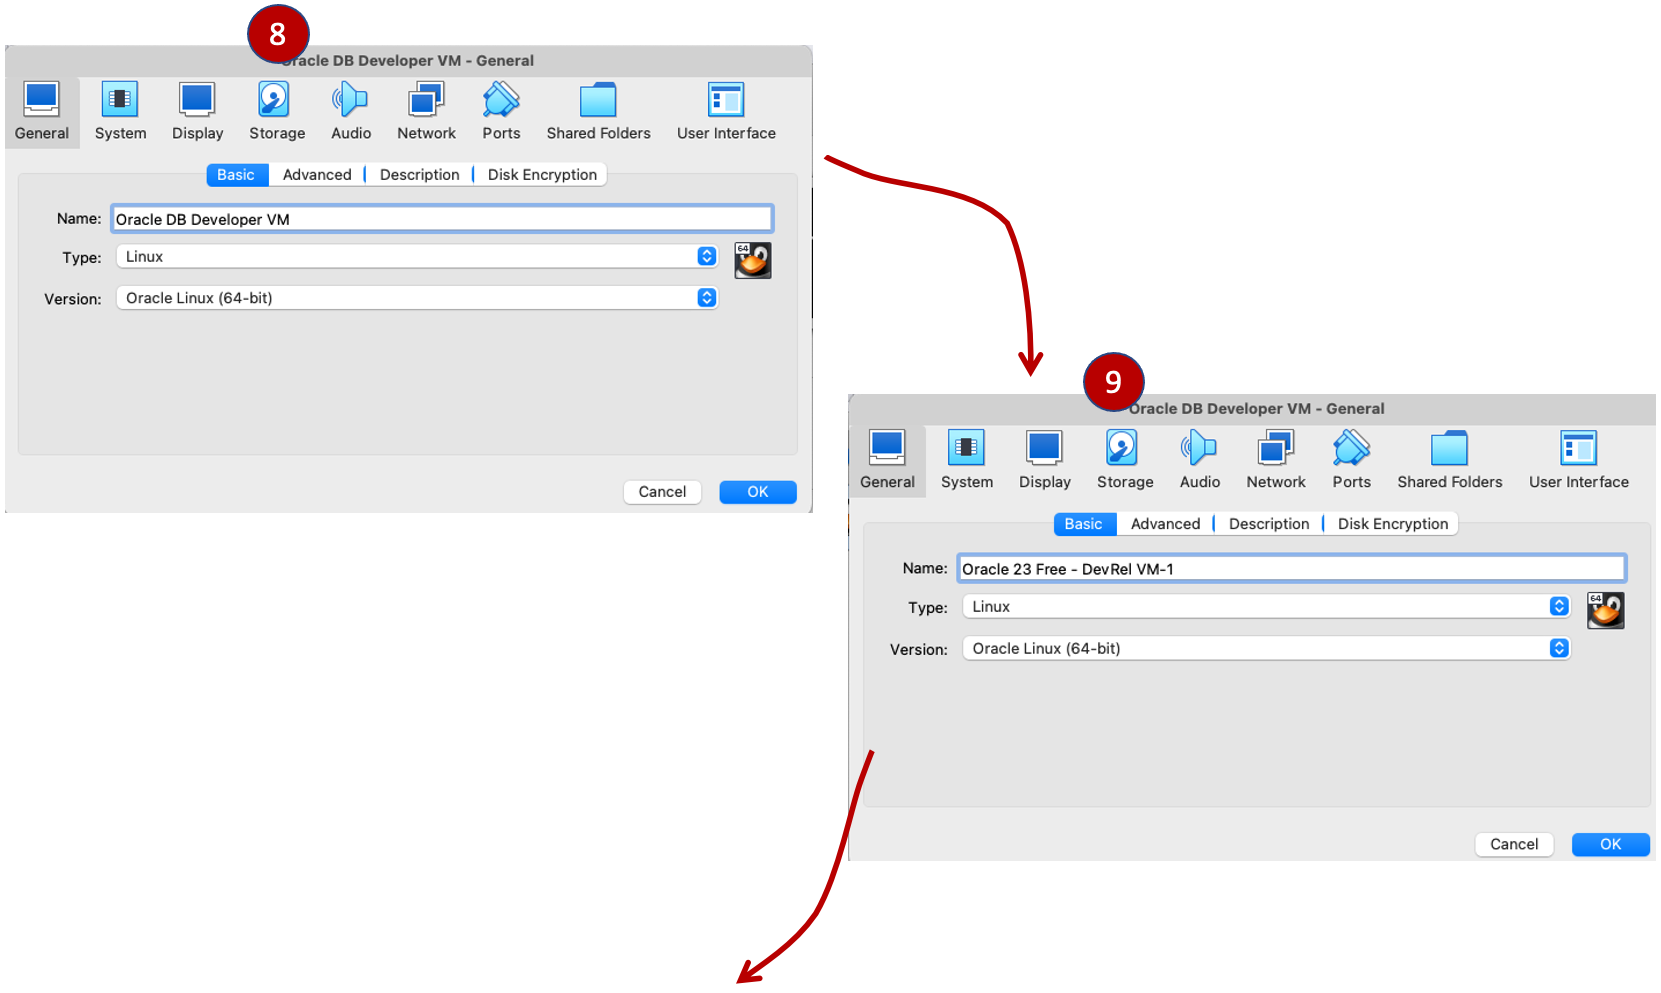
8 – To rename the VM, open the settings
9 – Change the name of the VM
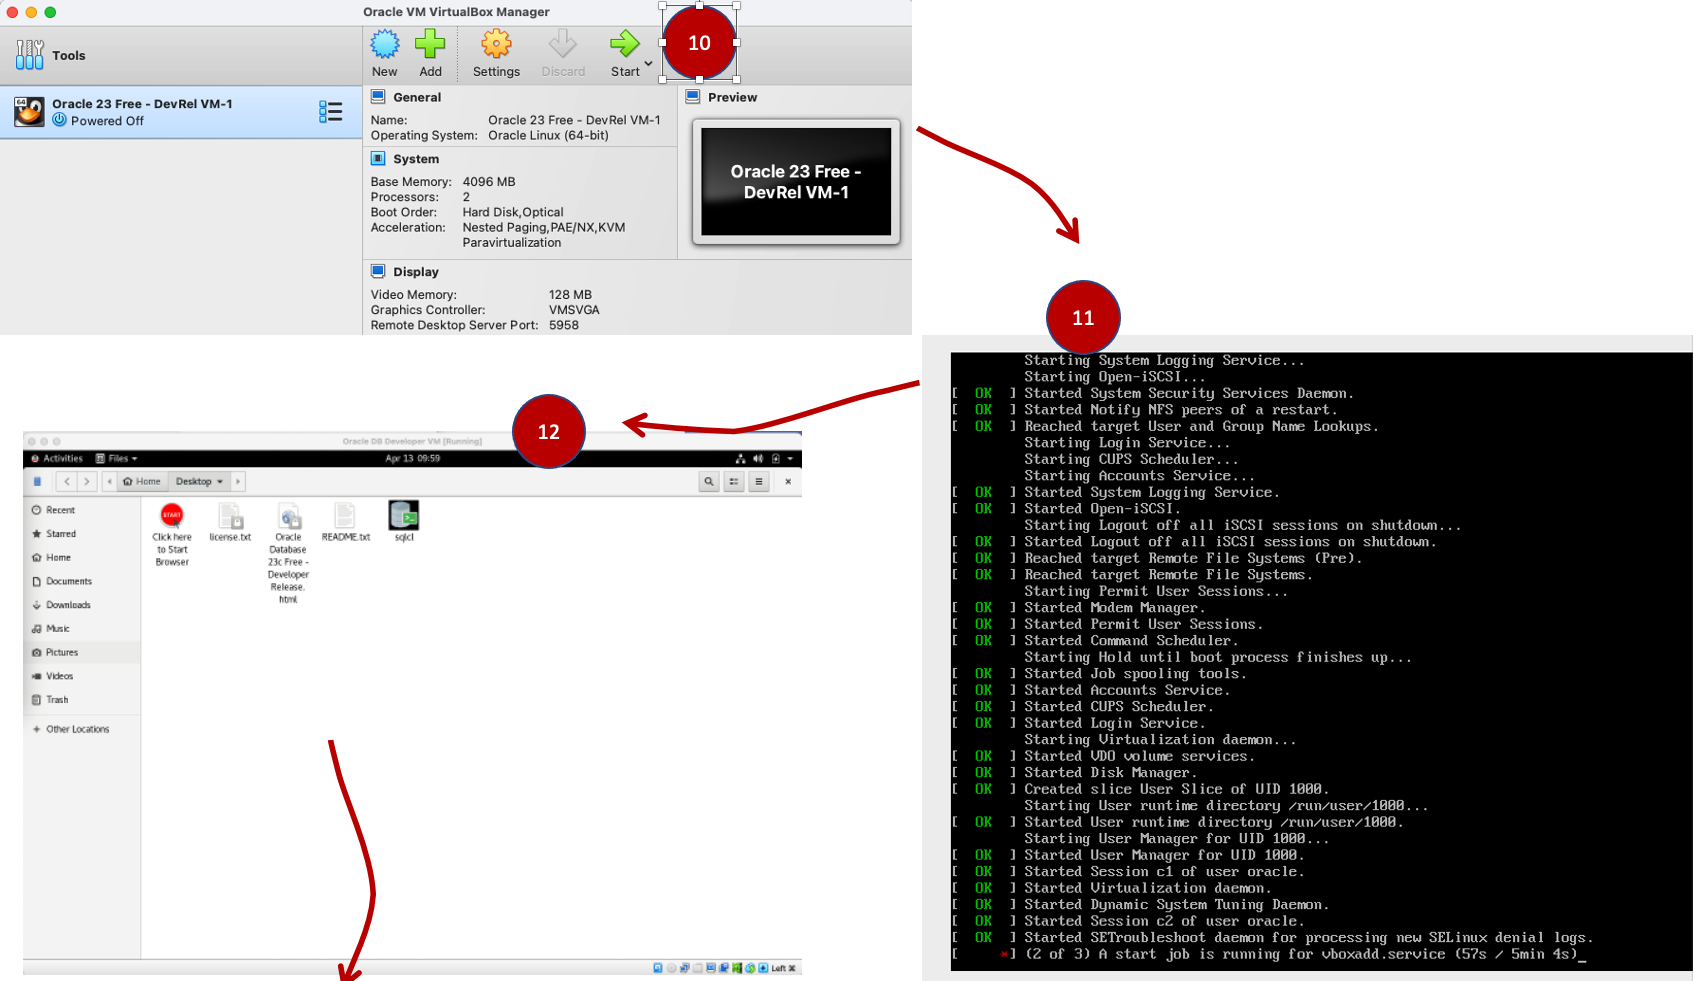
10 – Start the VM
11 – The terminal window will display the start process. Wait until it is finished.
12 – VM has started and the Desktop is displayed. Check out each of the files/icons, as there is a lot of information there.
13 – Desktop with terminal window displaying details from readme file, with passwords and connection details.
14 – Readme file

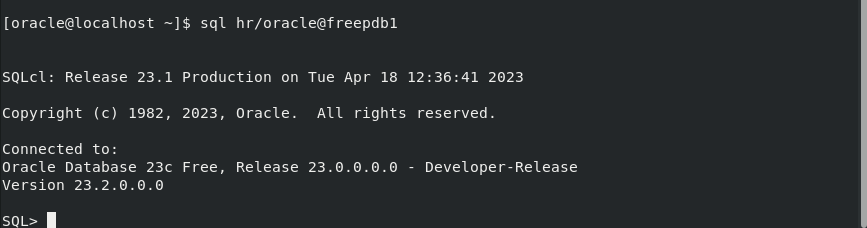
The VM is configured with port forwarding, which means you can treat the VM as a server and run commands from your computer (as a client machine. Alternatively, you can open a terminal window in the VM and run SQLcl. The following illustrates connecting to the database using SQLcl on the VM.
After starting-up the VM, you’ll probably be prompted to update the Extensions pack. Just follow the instructions to complete this quickly.
Check out the blog post by Jeff Smith with some advanced settings you might need for the VM.

You must be logged in to post a comment.