Python for OCI installation and configuration
Having set up your Oracle Cloud account and perhaps initiated some services, such as an Autonomous Database or an AI Service, you have some options with how you’ll interact with those services. The first is to use the online interfaces and tools for them. Another is to access these OCI services from your local PC or laptop. This latter method gives you greater flexibility for accessing these services, automating various tasks and building out some applications. This post will step through how to install the necessary Python library, how to configure for connecting to OCI and will demo some of the simpler APIs for accessing the OCI services. This will help you verify your connection is working correctly.
The simple part of this is installing the OCI library!
pip3 install oci
Like I said that’s the simple part.
The next step involves the configuration of a connection to your OCI tenancy. But before you can do this you need to have an account on OCI. If you don’t have one already, the easiest and FREE way to do this is to set up an account on the Oracle Free Tier. There is some Free stuff you can use, plus getting a few hundred dollars to spend on some of the other non-Free cloud services. When you’ve completed this you can move on to the next step.
We need to create the config file that will contain the required credentials and information for working with OCI. By default, this file is stored in : ~/.oci/config
mkdir ~/oci
cd oci
Now create the config file, using vi or something similar.
vi config
Edit the file to contain the following, but look out for the parts that need to be changed/updated to match your OCI account details.
[ADMIN_USER]
user=ocid1.user.oc1..<unique_ID>
fingerprint=<your_fingerprint>
tenancy = ocid1.tenancy.oc1..<unique_ID>
region = us-phoenix-1
key_file=<path to key .pem file>
The above details can be generated by creating an API key for your OCI user. Copy and Pate the default details to the config file.
- [ADMIN_USER] > you can name this anything you want, but it will referenced in Python.
- user > enter the user ocid. OCID is the unique resource identifier that OCI provides for each resource.
- fingerprint > refers to the fingerprint of the public key you configured for the user.
- tenancy > your tenancy OCID.
- region > the region that you are subscribed to.
- key_file > the path to the .pem file you generated.
Just download the .epm file and the config file details. Add them to the config file, and give the full path to the .epm file, including it’s name.
You are now ready to use the OCI Python library to access and use your OCI cloud environment. Let’s run some tests to see if everything works and connects ok.
config = oci.config.from_file(
     "~/.oci/config")
identity = oci.identity.IdentityClient(config)
user = identity.get_user(config["user"]).data
print(user)
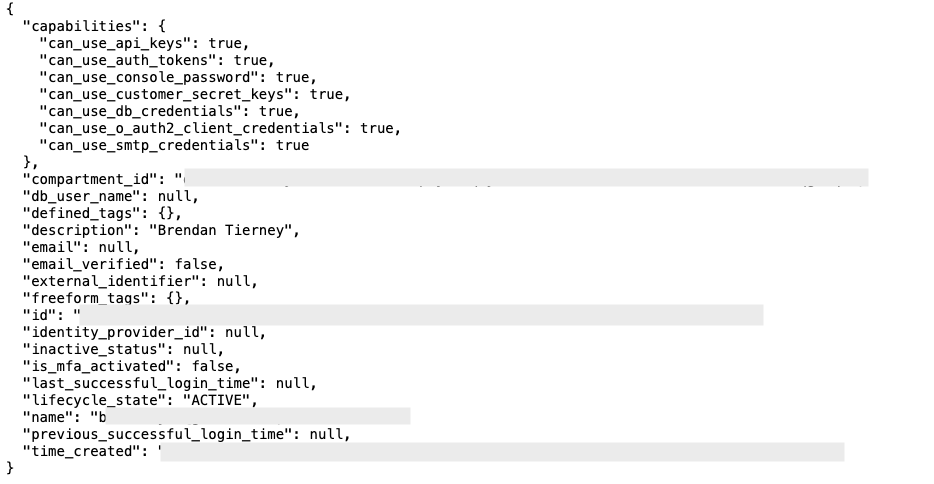
The above connects to OCI using the config file we’ve just created and will print the following details about the connect.

The following lists all the available shapes available to me in the us-ashburn-1 region.
database_client = oci.database.DatabaseClient(config)

# Send the request to service, some parameters are not required, see API
# doc for more info
list_db_system_shapes_response = database_client.list_db_system_shapes(
    compartment_id=compart_id,
    availability_domain="us-ashburn-1")

# Get the data from response
print(list_db_system_shapes_response.data)
The listing for the above is very long, so I’ll leave that for you to explore.
For more details of the APIs available check out the Documentation and the GitHub Respository for more examples.
One thought on “Python for OCI installation and configuration”
Comments are closed.


October 26, 2023 at 1:05 pm
[…] Brendan Tierney peruses an SDK: […]
LikeLike