
How to Create an Oracle Gen AI Agent
In this post, I’ll walk you through the steps needed to create a Gen AI Agent on Oracle Cloud. We have seen lots of solutions offered by my different providers for Gen AI Agents. This post focuses on just what is available on Oracle Cloud. You can create a Gen AI Agent manually. However, testing and fine-tuning based on various chunking strategies can take some time. With the automated options available on Oracle Cloud, you don’t have to worry about chunking. It handles all the steps automatically for you. This means you need to be careful when using it. Allocate some time for testing to ensure it meets your requirements. The steps below point out some checkboxes. You need to check them to ensure you generate a more complete knowledge base and outcome.
For my example scenario, I’m going to build a Gen AI Agent for some of the works by Shakespeare. I got the text of several plays from the Gutenberg Project website. The process for creating the Gen AI Agent is:

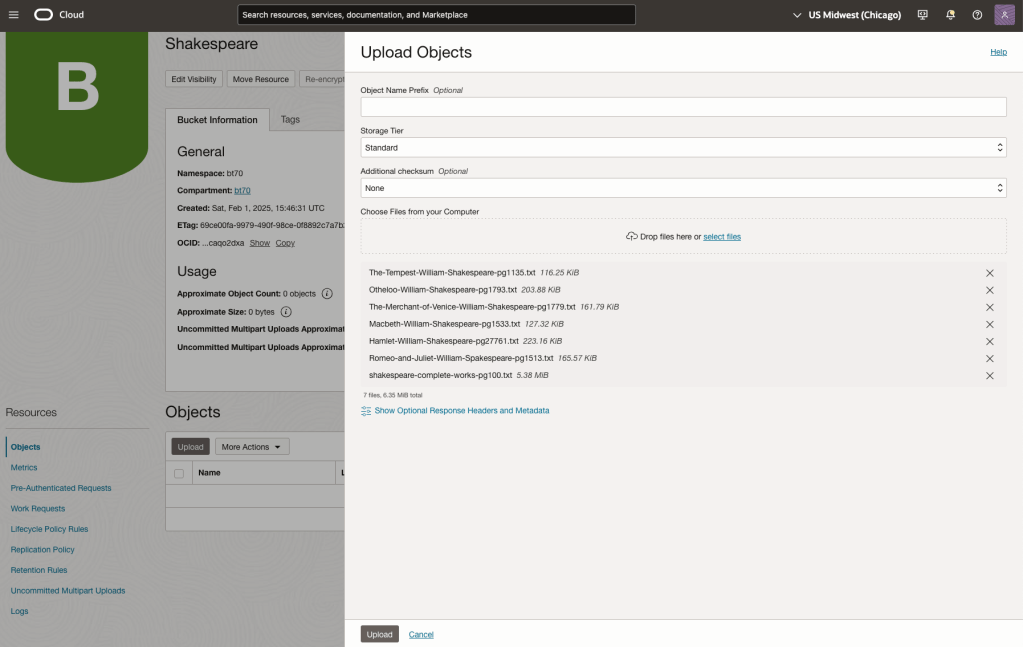
Step-1 Load Files to a Bucket on OCI
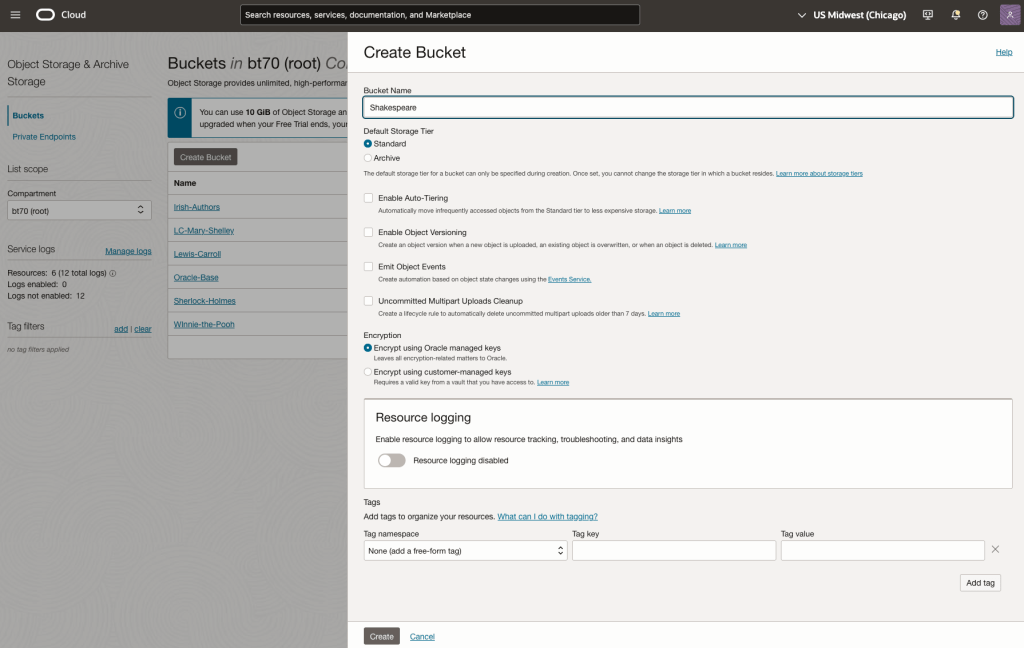
Create a bucket called Shakespeare.
Load the files from your computer into the Bucket. These files were obtained from the Gutenberg Project site.
Step-2 Define a Data Source (documents you want to use) & Create a Knowledge Base
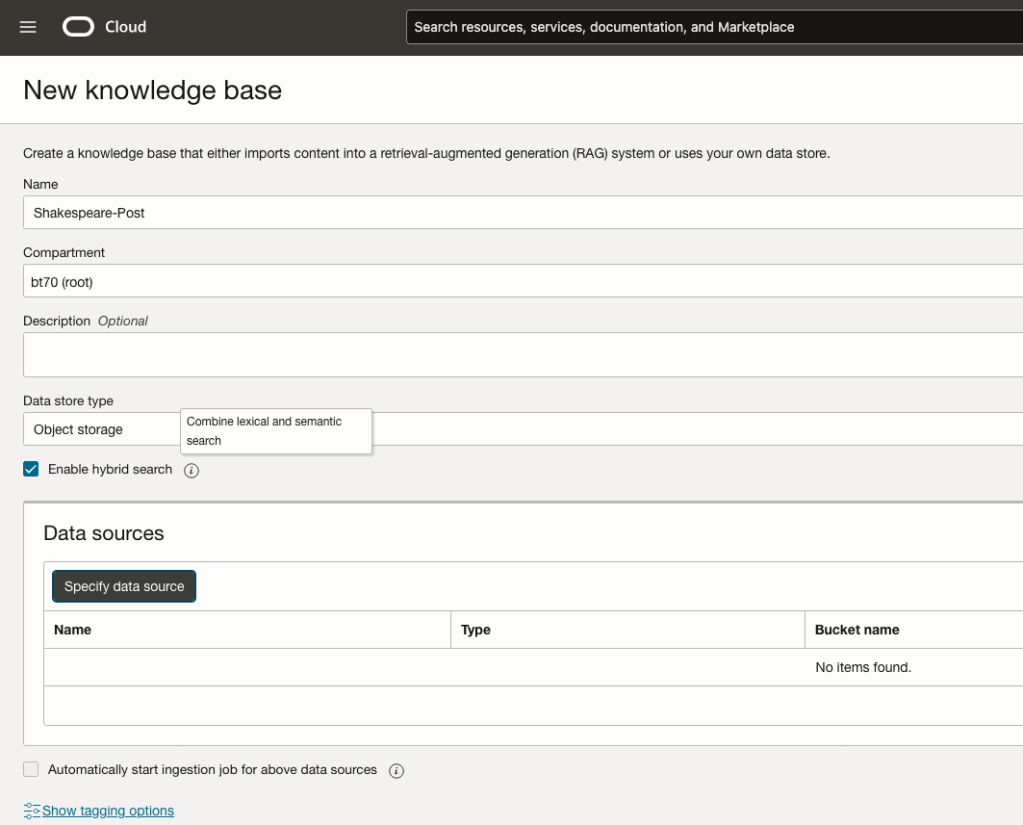
Click on Create Knowledge Base and give it a name ‘Shakespeare’.
Check the ‘Enable Hybrid Search’. checkbox. This will enable both lexical and semantic search. [this is Important]
Click on ‘Specify Data Source’
Select the Bucket from the drop-down list (Shakespeare bucket).
Check the ‘Enable multi-modal parsing’ checkbox.
Select the files to use or check the ‘Select all in bucket’
Click Create.

The Knowledge Base will be created. The files in the bucket will be parsed, and structured for search by the AI Agent. This step can take a few minutes as it needs to process all the files. This depends on the number of files to process, their format and the size of the contents in each file.
Step-3 Create Agent
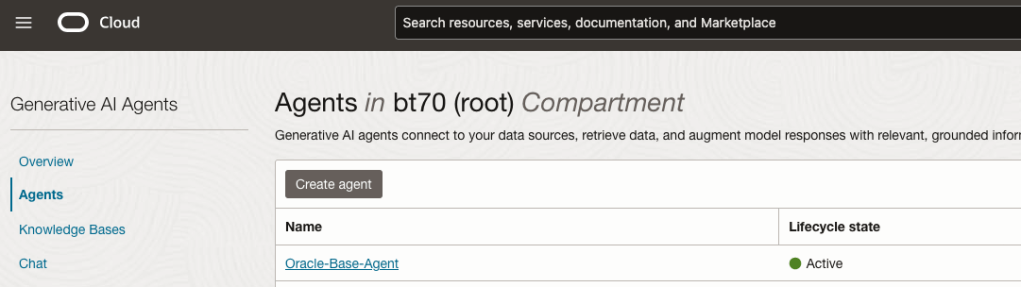
Go back to the main Gen AI menu and select Agent and then Create Agent.
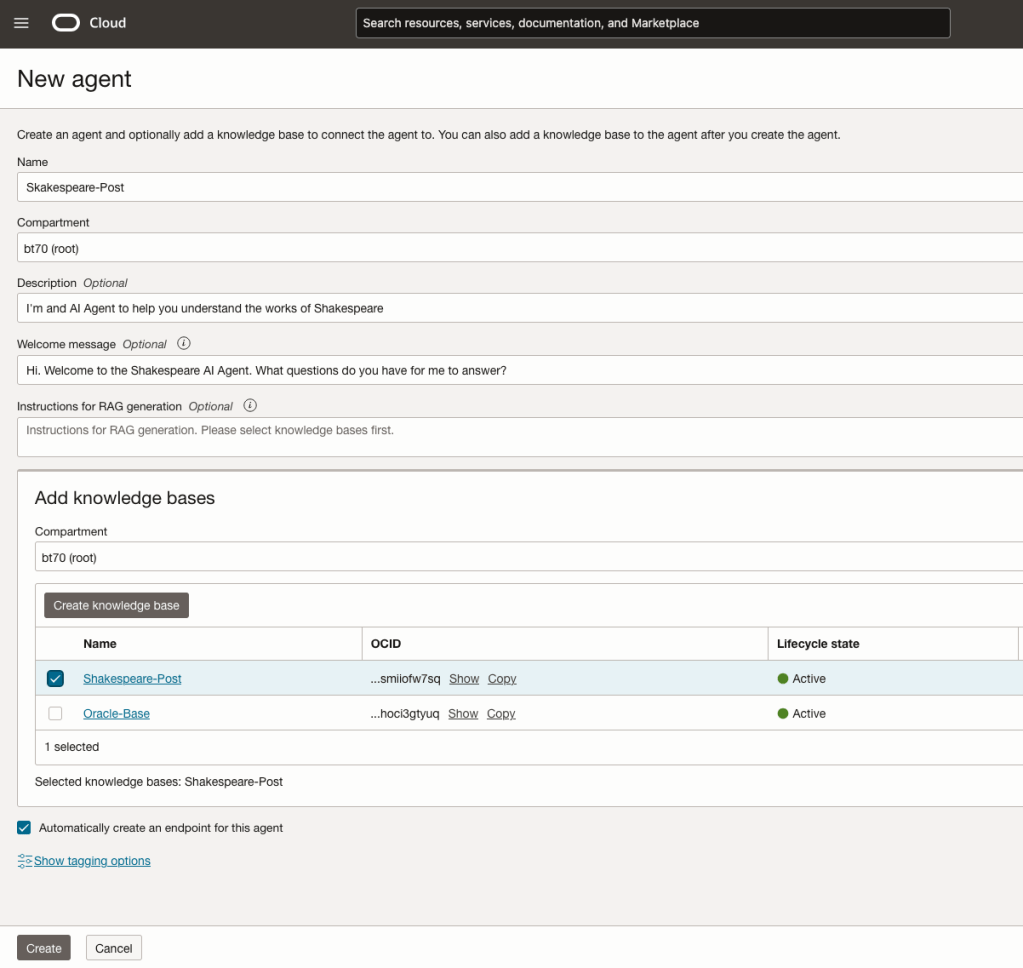
You can enter the following details:
- Name of the Agent
- Some descriptive information
- A Welcome message for people using the Agent
- Select the Knowledge Base from the list.
The checkbox for creating Endpoints should be checked.
Click Create.
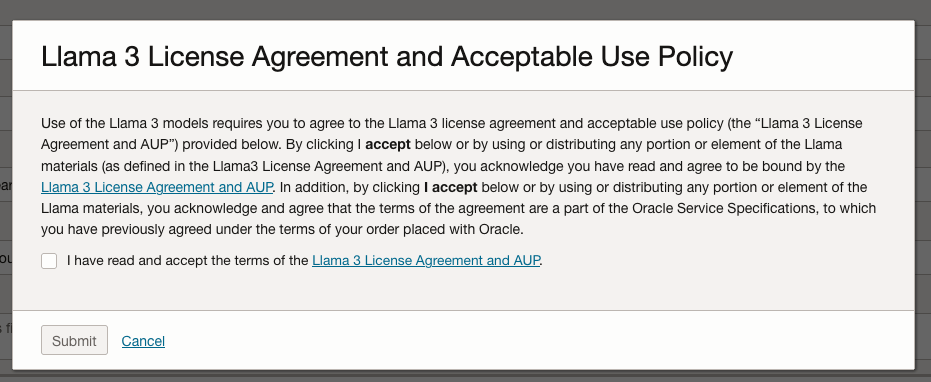
A pop-up window will appear asking you to agree to the Llama 3 License. Check this checkbox and click Submit.
After the agent has been created, check the status of the endpoints. These generally take a little longer to create, and you need these before you can test the Agent using the Chatbot.
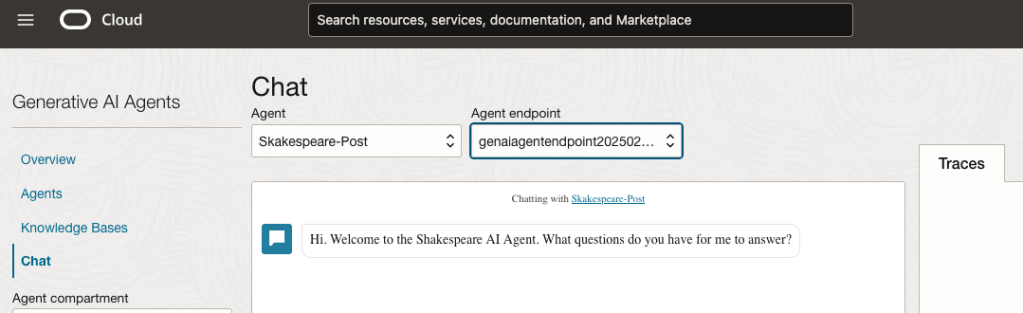
Step-4 Test using Chatbot
After verifying the endpoints have been created, you can open a Chatbot by clicking on ‘Chat’ from the menu on the left-hand side of the screen.
Select the name of the ‘Agent’ from the drop-down list e.g. Shakespeare-Post.
Select an end-point for the Agent.
After these have been selected you will see the ‘Welcome’ message. This was defined when creating the Agent.
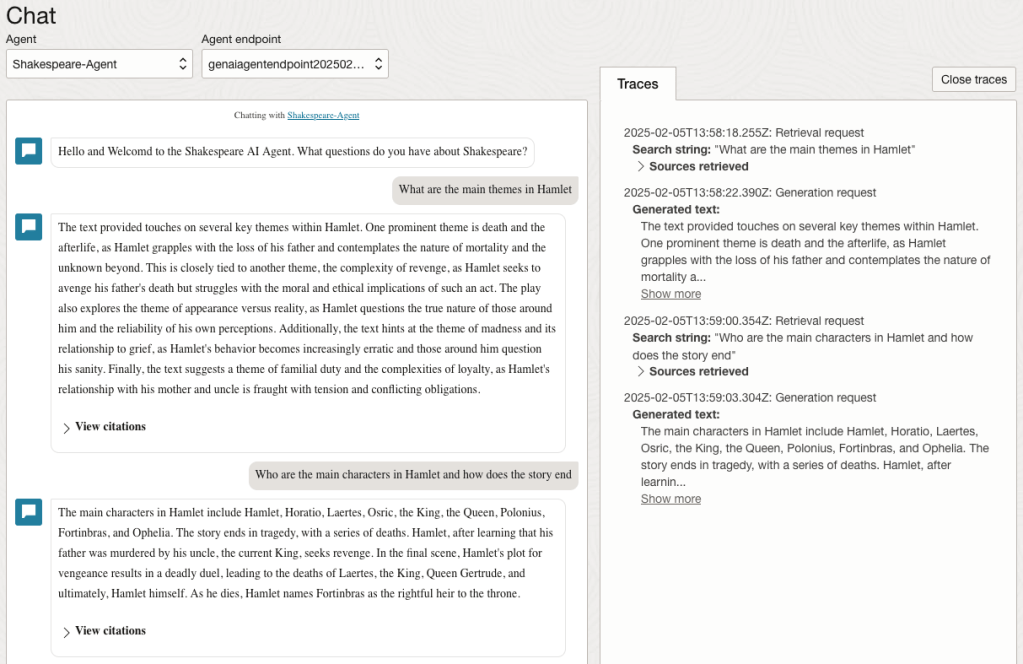
Here are a couple of examples of querying the works by Shakespeare.
In addition to giving a response to the questions, the Chatbot also lists the sections of the underlying documents and passages from those documents used to form the response/answer.
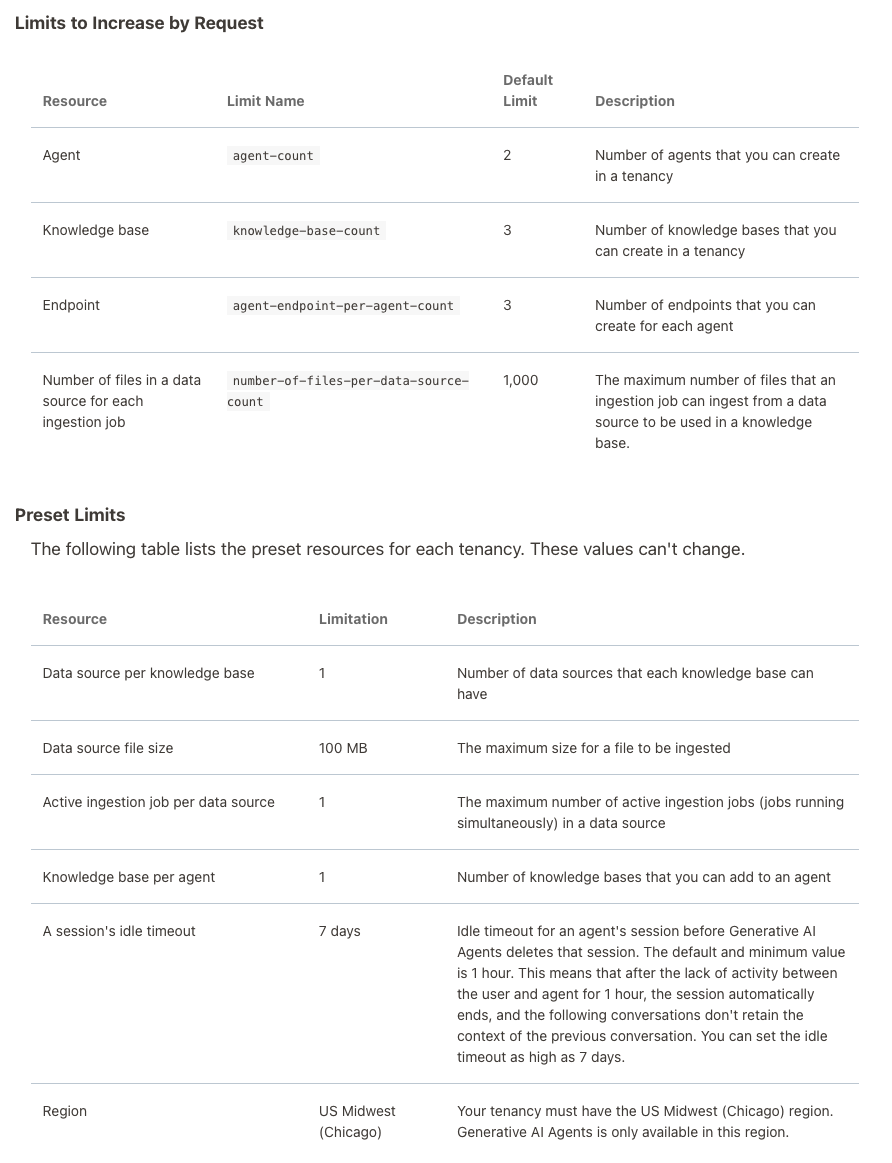
When creating Gen AI Agents, you need to be careful of two things. The first is the Cloud Region. Gen AI Agents are only available in certain Cloud Regions. If they aren’t available in your Region, you’ll need to request access to one of those or setup a new OCI account based in one of those regions. The second thing is the Resource Limits. At the time of writing this post, the following was allowed. Check out the documentation for more details. You might need to request that these limits be increased.
I’ll have another post showing how you can run the Chatbot on your computer or VM as a webpage.
