
Oracle Cloud Infrastructure
How to Create an Oracle Gen AI Agent
In this post, I’ll walk you through the steps needed to create a Gen AI Agent on Oracle Cloud. We have seen lots of solutions offered by my different providers for Gen AI Agents. This post focuses on just what is available on Oracle Cloud. You can create a Gen AI Agent manually. However, testing and fine-tuning based on various chunking strategies can take some time. With the automated options available on Oracle Cloud, you don’t have to worry about chunking. It handles all the steps automatically for you. This means you need to be careful when using it. Allocate some time for testing to ensure it meets your requirements. The steps below point out some checkboxes. You need to check them to ensure you generate a more complete knowledge base and outcome.
For my example scenario, I’m going to build a Gen AI Agent for some of the works by Shakespeare. I got the text of several plays from the Gutenberg Project website. The process for creating the Gen AI Agent is:

Step-1 Load Files to a Bucket on OCI
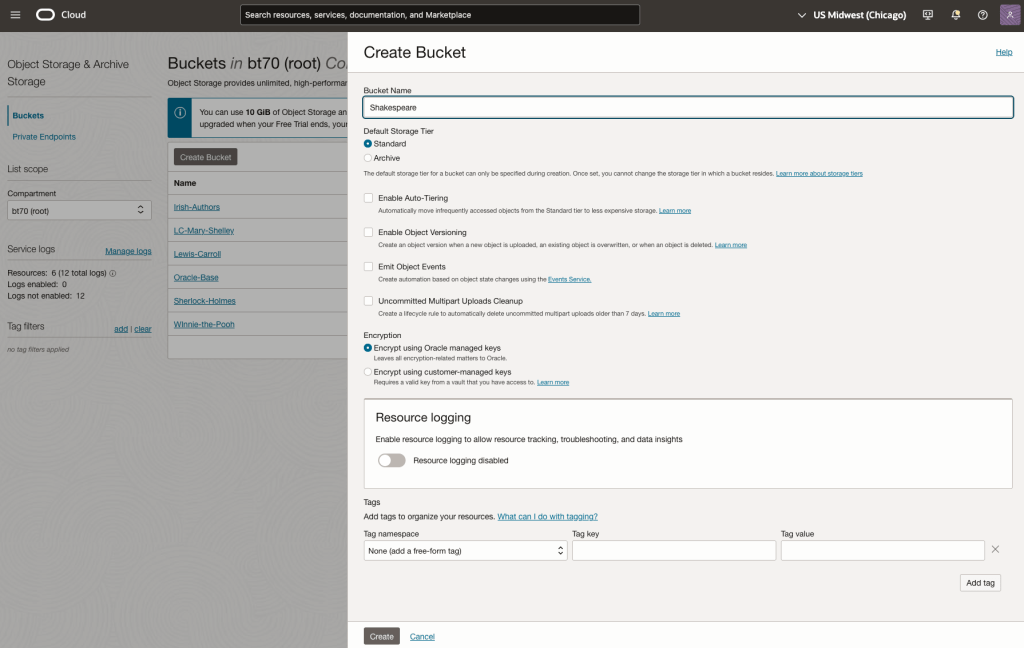
Create a bucket called Shakespeare.
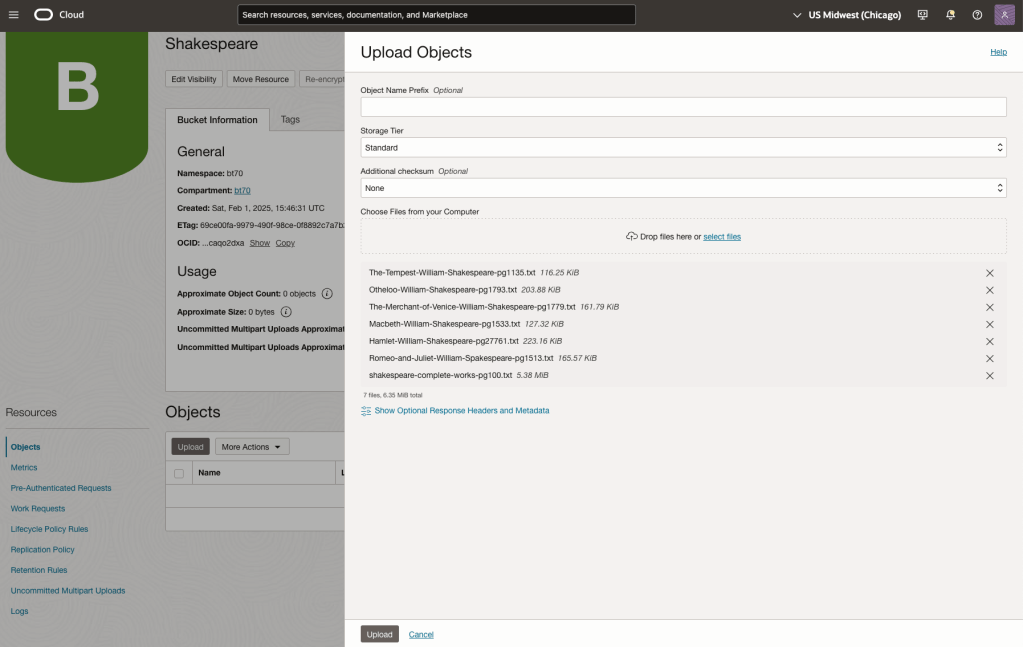
Load the files from your computer into the Bucket. These files were obtained from the Gutenberg Project site.
Step-2 Define a Data Source (documents you want to use) & Create a Knowledge Base
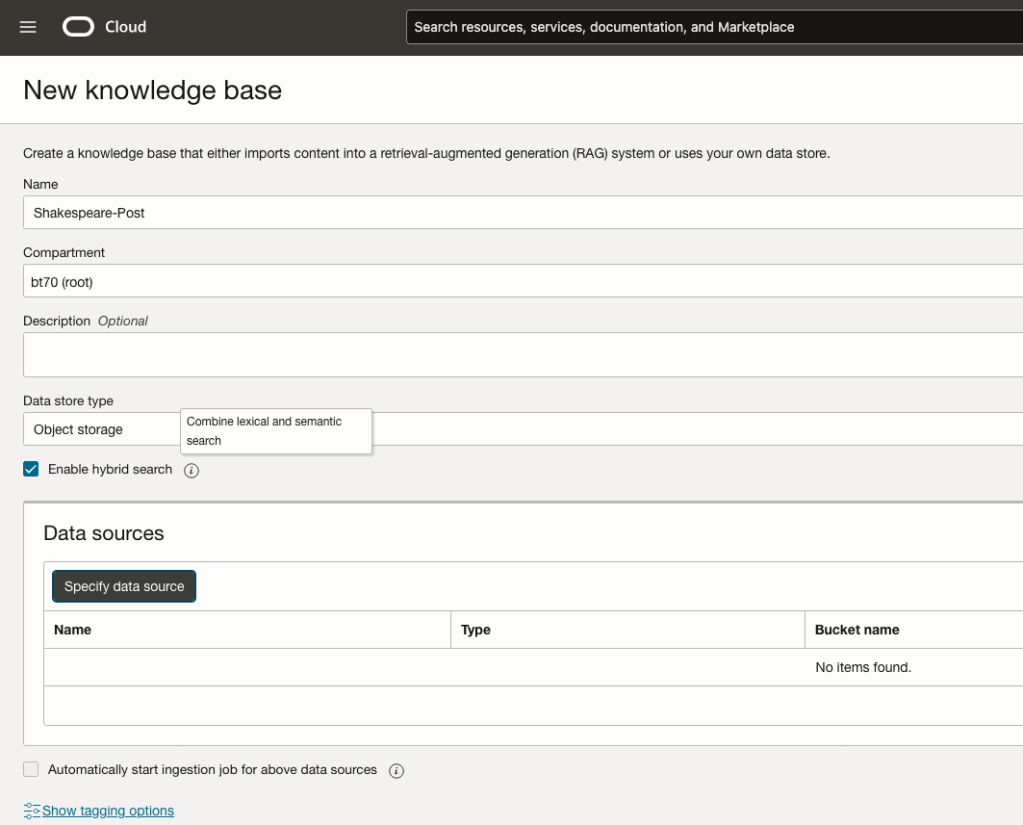
Click on Create Knowledge Base and give it a name ‘Shakespeare’.
Check the ‘Enable Hybrid Search’. checkbox. This will enable both lexical and semantic search. [this is Important]
Click on ‘Specify Data Source’
Select the Bucket from the drop-down list (Shakespeare bucket).
Check the ‘Enable multi-modal parsing’ checkbox.
Select the files to use or check the ‘Select all in bucket’
Click Create.

The Knowledge Base will be created. The files in the bucket will be parsed, and structured for search by the AI Agent. This step can take a few minutes as it needs to process all the files. This depends on the number of files to process, their format and the size of the contents in each file.
Step-3 Create Agent
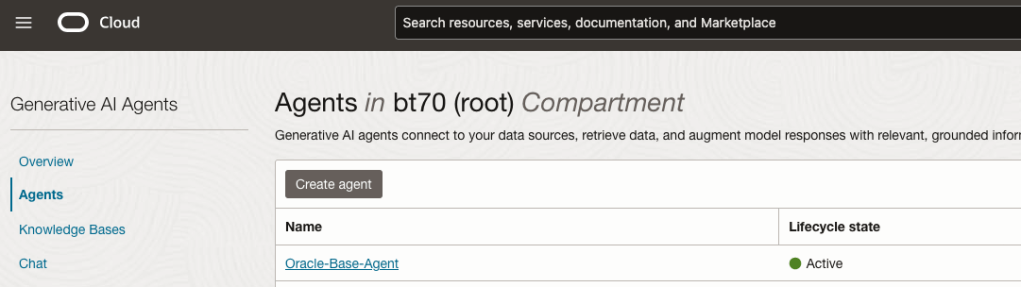
Go back to the main Gen AI menu and select Agent and then Create Agent.
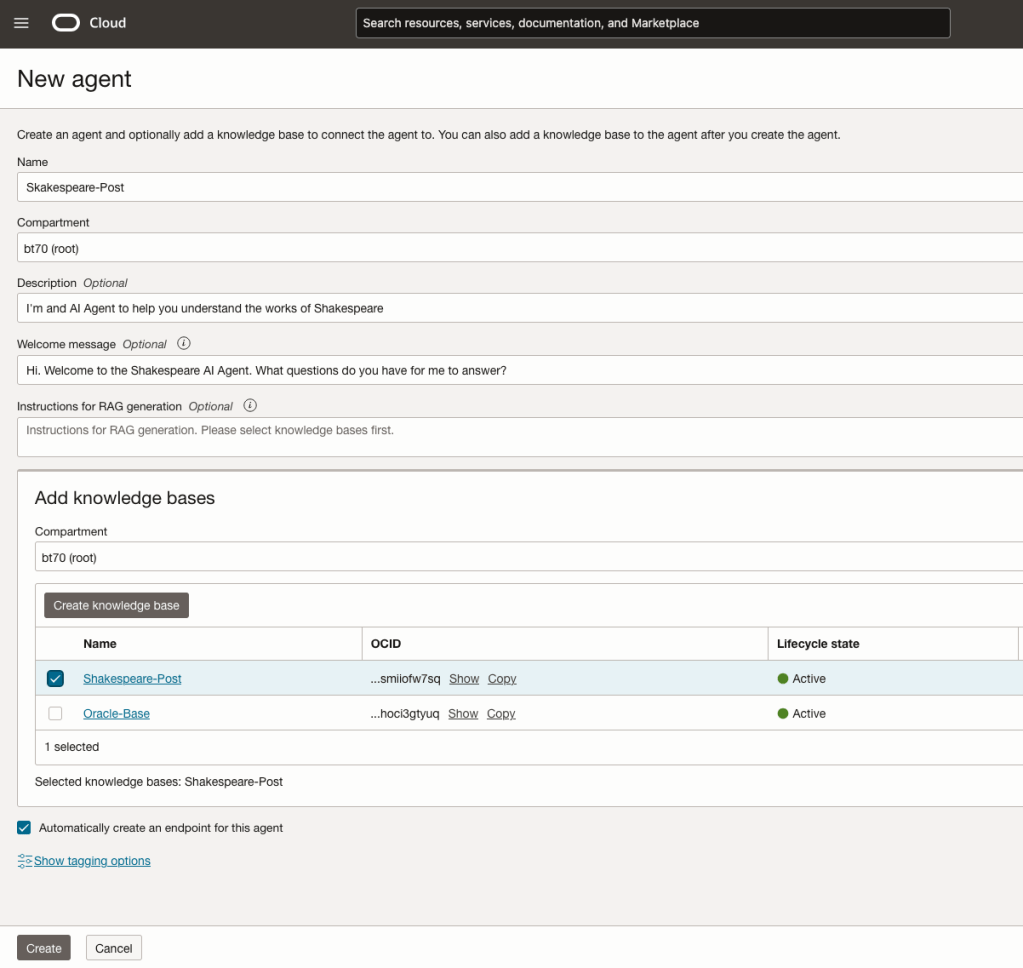
You can enter the following details:
- Name of the Agent
- Some descriptive information
- A Welcome message for people using the Agent
- Select the Knowledge Base from the list.
The checkbox for creating Endpoints should be checked.
Click Create.
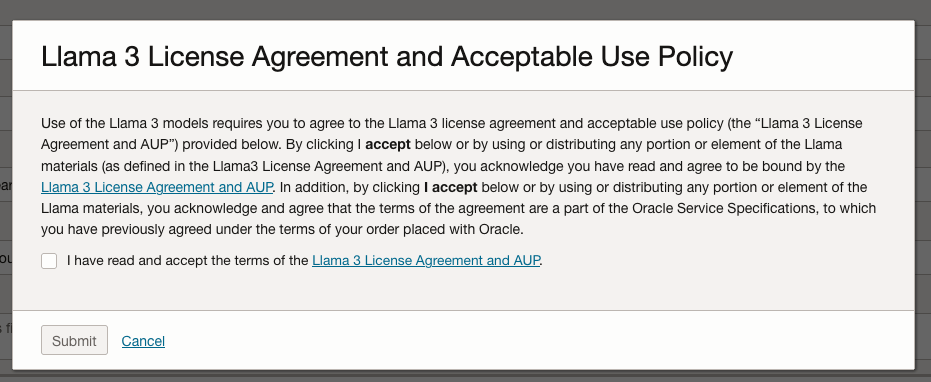
A pop-up window will appear asking you to agree to the Llama 3 License. Check this checkbox and click Submit.
After the agent has been created, check the status of the endpoints. These generally take a little longer to create, and you need these before you can test the Agent using the Chatbot.
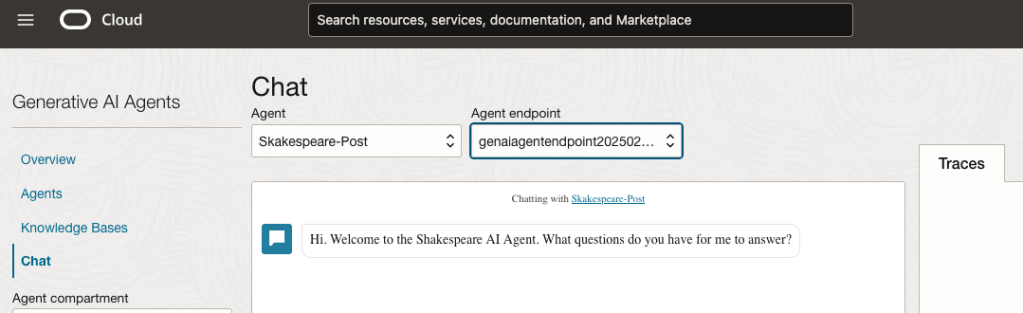
Step-4 Test using Chatbot
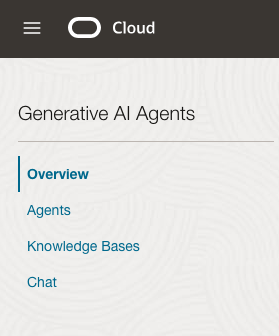
After verifying the endpoints have been created, you can open a Chatbot by clicking on ‘Chat’ from the menu on the left-hand side of the screen.
Select the name of the ‘Agent’ from the drop-down list e.g. Shakespeare-Post.
Select an end-point for the Agent.
After these have been selected you will see the ‘Welcome’ message. This was defined when creating the Agent.
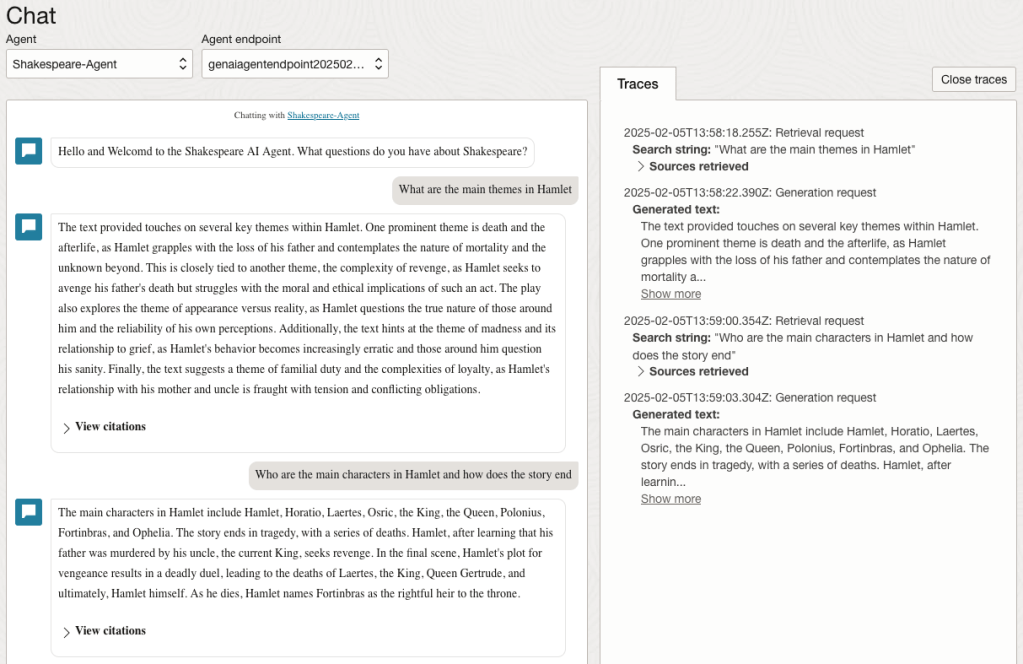
Here are a couple of examples of querying the works by Shakespeare.
In addition to giving a response to the questions, the Chatbot also lists the sections of the underlying documents and passages from those documents used to form the response/answer.
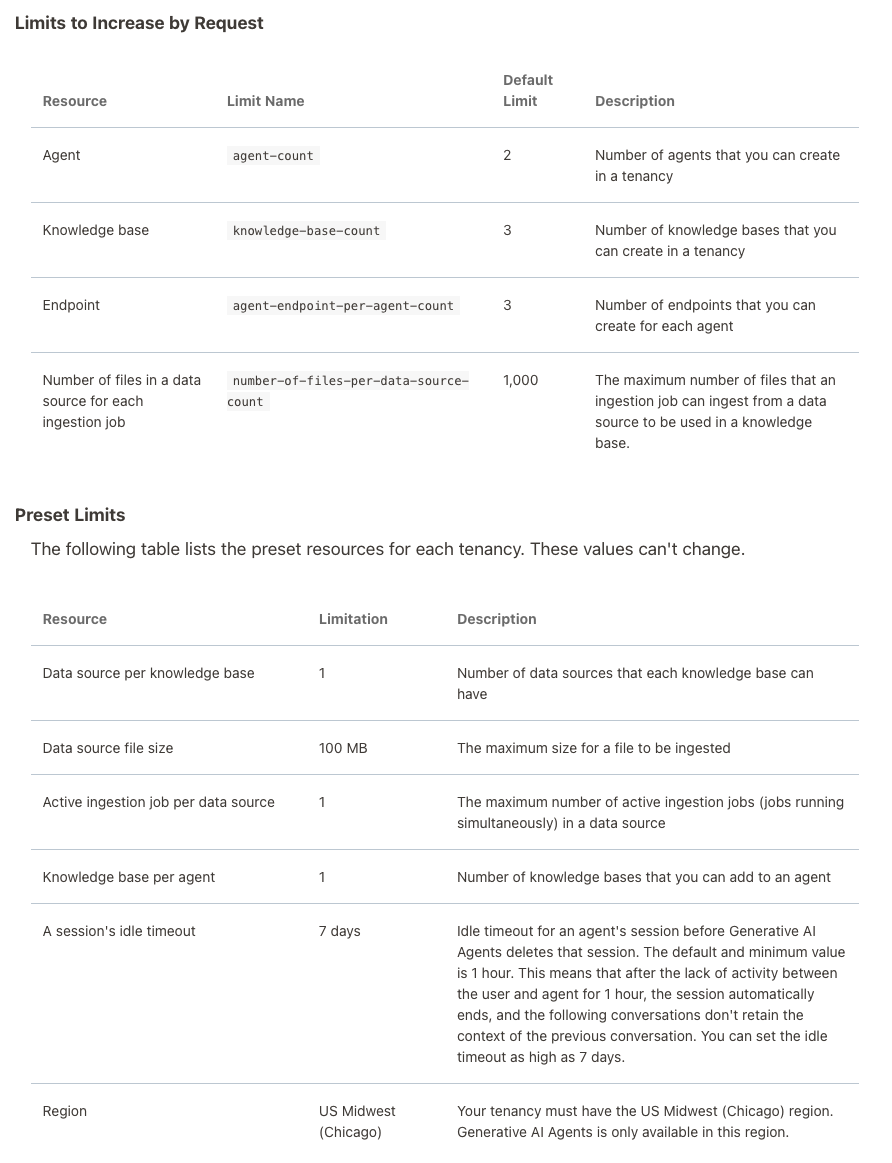
When creating Gen AI Agents, you need to be careful of two things. The first is the Cloud Region. Gen AI Agents are only available in certain Cloud Regions. If they aren’t available in your Region, you’ll need to request access to one of those or setup a new OCI account based in one of those regions. The second thing is the Resource Limits. At the time of writing this post, the following was allowed. Check out the documentation for more details. You might need to request that these limits be increased.
I’ll have another post showing how you can run the Chatbot on your computer or VM as a webpage.
Oracle Object Storage – Setup and Explore
This blog post will walk you through how to access Oracle OCI Object Storage and explore what buckets and files you have there, using Python and the OCI Python library. There will be additional posts which will walk through some of the other typical tasks you’ll need to perform with moving files into and out of OCI Object Storage.
- Oracle Object Storage – Buckets & Loading files
- Oracle Object Storage – Downloading and Deleting
- Oracle Object Storage – Parallel Uploading
The first thing you’ll need to do is to install the OCI Python library. You can do this by running pip command or if using Anaconda using their GUI for doing this. For example,
pip3 install ociCheck out the OCI Python documentation for more details.
Next, you’ll need to get and setup the configuration settings and download the pem file.
We need to create the config file that will contain the required credentials and information for working with OCI. By default, this file is stored in : ~/.oci/config
mkdir ~/oci
cd oci
Now create the config file, using vi or something similar.
vi config
Edit the file to contain the following, but look out for the parts that need to be changed/updated to match your OCI account details.
[ADMIN_USER]user=ocid1.user.oc1..<unique_ID>
fingerprint=<your_fingerprint>
tenancy = ocid1.tenancy.oc1..<unique_ID>
region = us-phoenix-1key_file=
<path to key .pem file>
The above details can be generated by creating an API key for your OCI user. Copy and paste the default details to the config file.
- [ADMIN_USER] > you can name this anything you want, but it will referenced in Python.
- user > enter the user ocid. OCID is the unique resource identifier that OCI provides for each resource.
- fingerprint > refers to the fingerprint of the public key you configured for the user.
- tenancy > your tenancy OCID.
- region > the region that you are subscribed to.
- key_file > the path to the .pem file you generated.

Just download the .pem file and the config file details. Add them to the config file, and give the full path to the .epm file, including its name.
You are now ready to use the OCI Python library to access and use your OCI cloud environment. Let’s run some tests to see if everything works and connects ok.
#import libraries
import oci
import json
import os
import io

#load the config file
config = oci.config.from_file("~/.oci/config")
config

#only part of the output is displayed due to security reasons
{'log_requests': False, 'additional_user_agent': '', 'pass_phrase': None, 'user': 'oci...........
We can now define some core variables.
#My Compartment ID
COMPARTMENT_ID = "ocid1.tenancy.oc1..............

#Object storage Namespace
object_storage_client = oci.object_storage.ObjectStorageClient(config)
NAMESPACE = object_storage_client.get_namespace().data

#Name of Bucket for this demo
BUCKET_NAME = 'DEMO_Bucket'
We can now define some functions to:
- List the Buckets in my OCI account
- List the number of files in each Bucket
- Number of files in a particular Bucket
- Check for Bucket Existence
def list_buckets():
    l_buckets = object_storage_client.list_buckets(NAMESPACE, COMPARTMENT_ID).data
    # Get the data from response
    for bucket in l_buckets:
        print(bucket.name)

def list_bucket_counts():
    l_buckets = object_storage_client.list_buckets(NAMESPACE, COMPARTMENT_ID).data
    for bucket in l_buckets:
        print("Bucket name: ",bucket.name)
        buck_name = bucket.name
        objects = object_storage_client.list_objects(NAMESPACE, buck_name).data
        count = 0
        for i in objects.objects:
            count+=1

        print('... num of objects :', count)

def check_bucket_exists(b_name):
    #check if Bucket exists
    is_there = False
    l_b = object_storage_client.list_buckets(NAMESPACE, COMPARTMENT_ID).data
    for bucket in l_b:
        if bucket.name == b_name:
            is_there = True

    if is_there == True:
        print(f'Bucket {b_name} exists.')
    else:
        print(f'Bucket {b_name} does not exist.')

    return is_there

def list_bucket_details(b):
    bucket_exists = check_bucket_exists(b)
    if bucket_exists == True:
        objects = object_storage_client.list_objects(NAMESPACE, b).data
        count = 0
        for i in objects.objects:
            count+=1

        print(f'Bucket {b} has objects :', count)
Now we can run these functions to test them. Before running these make sure you can create a connection to OCI.

ADW – Loading data using Object Storage
There are a number of different ways to load data into your Autonomous Data Warehouse (ADW) environment. I’ll have posts about these alternatives.
In this blog post I’ll go through the steps needed to load data using Object Storage. This might appear to have a large-ish number of steps, but once you have gone through it and have some of the parts already setup and configuration from your first time, then the second and subsequent times will be easier.
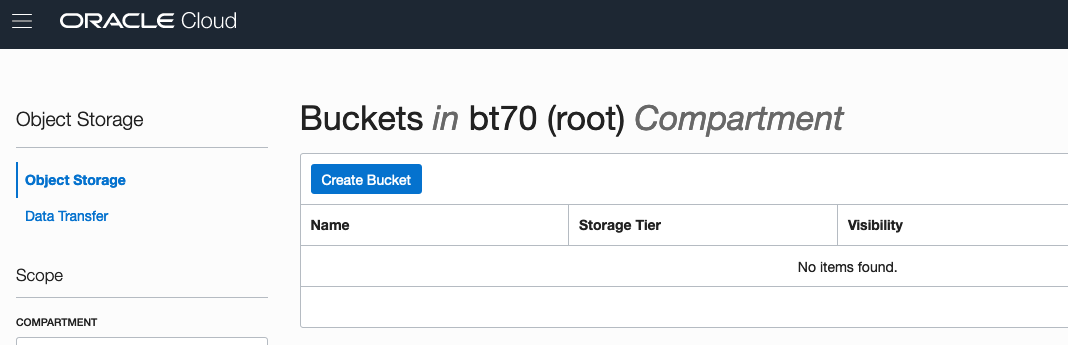
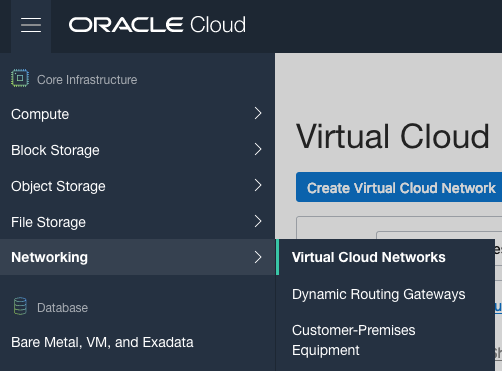
After logging into your Oracle Cloud dashboard, select Object Storage from the side menu.

Then click on the Create Bucket button.
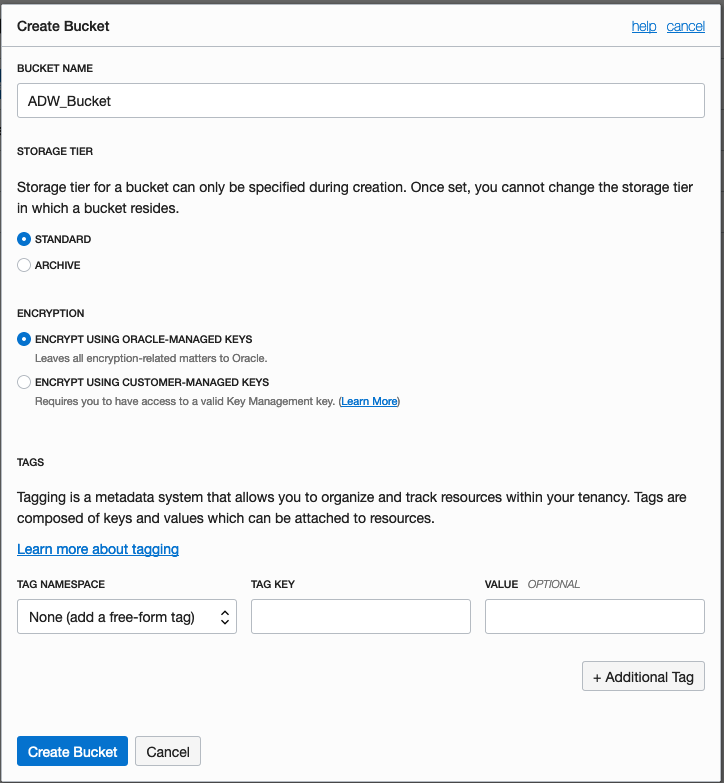
Enter a name for the Object Storage bucket, take the defaults for the for the rest, and click on the Create Bucket button at the bottom. In my example, I’ve called the bucket ‘ADW_Bucket’.
Click on the name of the bucket in the list.

And then click Upload Objects button.

In the Upload Objects window, browse for the file(s) you want to upload.


Then click on the Upload Objects button on the Upload Objects window. After a few moments you will see a message saying the file(s) have been uploaded. Click on the Close window.

Click into the Object details and take a note/copy of the URL Path. You will need this later
To load data from the Oracle Cloud Infrastructure(OCI) Object Storage you will need an OCI user with the appropriate privileges to read data (or upload) data to the Object Store. The communication between the database and the object store relies on the Swift protocol and the OCI user Auth Token. Go back to the menu in the upper left and select users.


Then click on the user name to view the details. This is probably your OCI username.
On the left hand side of the page click Auth Tokens, and then click on Generate Token button. Give a name for the token e.g ADW_TOKEN, and then generate token.

Save the generated token to use later.

Open SQL Developer and setup a connection to your OML User/schema. When connected the next steps is to authenticate with the Object storage using your OCI username and the Auth Token, generated above.
BEGIN
  DBMS_CLOUD.CREATE_CREDENTIAL(
    credential_name => 'ADW_TOKEN',
    username => '<your cloud username>',
    password => '<generated auth token>'
  );
END;
If successful you should get the following message. If not then you probably entered something incorrectly. Go back and review the previous steps
PL/SQL procedure successfully completed.
Next, create a table to store the data you want to import. For my table the create table is the following. [It is one of the sample data sets for OML, and I’ve made the create table statement compact to save space in this post]
create table credit_scoring_100k
( customer_id number(38,0), age number(4,0), income number(38,0), marital_status varchar2(26 byte),
number_of_liables number(3,0), wealth varchar2(4000 byte), education_level varchar2(26 byte),
tenure number(4,0), loan_type varchar2(26 byte), loan_amount number(38,0),
loan_length number(5,0), gender varchar2(26 byte), region varchar2(26 byte),
current_address_duration number(5,0), residental_status varchar2(26 byte),
number_of_prior_loans number(3,0), number_of_current_accounts number(3,0),
number_of_saving_accounts number(3,0), occupation varchar2(26 byte),
has_checking_account varchar2(26 byte), credit_history varchar2(26 byte),
present_employment_since varchar2(26 byte), fixed_income_rate number(4,1),
debtor_guarantors varchar2(26 byte), has_own_phone_no varchar2(26 byte),
has_same_phone_no_since number(4,0), is_foreign_worker varchar2(26 byte),
number_of_open_accounts number(3,0), number_of_closed_accounts number(3,0),
number_of_inactive_accounts number(3,0), number_of_inquiries number(3,0),
highest_credit_card_limit number(7,0), credit_card_utilization_rate number(4,1),
delinquency_status varchar2(26 byte), new_bankruptcy varchar2(26 byte),
number_of_collections number(3,0), max_cc_spent_amount number(7,0),
max_cc_spent_amount_prev number(7,0), has_collateral varchar2(26 byte),
family_size number(3,0), city_size varchar2(26 byte), fathers_job varchar2(26 byte),
mothers_job varchar2(26 byte), most_spending_type varchar2(26 byte),
second_most_spending_type varchar2(26 byte), third_most_spending_type varchar2(26 byte),
school_friends_percentage number(3,1), job_friends_percentage number(3,1),
number_of_protestor_likes number(4,0), no_of_protestor_comments number(3,0),
no_of_linkedin_contacts number(5,0), average_job_changing_period number(4,0),
no_of_debtors_on_fb number(3,0), no_of_recruiters_on_linkedin number(4,0),
no_of_total_endorsements number(4,0), no_of_followers_on_twitter number(5,0),
mode_job_of_contacts varchar2(26 byte), average_no_of_retweets number(4,0),
facebook_influence_score number(3,1), percentage_phd_on_linkedin number(4,0),
percentage_masters number(4,0), percentage_ug number(4,0),
percentage_high_school number(4,0), percentage_other number(4,0),
is_posted_sth_within_a_month varchar2(26 byte), most_popular_post_category varchar2(26 byte),
interest_rate number(4,1), earnings number(4,1), unemployment_index number(5,1),
production_index number(6,1), housing_index number(7,2), consumer_confidence_index number(4,2),
inflation_rate number(5,2), customer_value_segment varchar2(26 byte),
customer_dmg_segment varchar2(26 byte), customer_lifetime_value number(8,0),
churn_rate_of_cc1 number(4,1), churn_rate_of_cc2 number(4,1),
churn_rate_of_ccn number(5,2), churn_rate_of_account_no1 number(4,1),
churn_rate__of_account_no2 number(4,1), churn_rate_of_account_non number(4,2),
health_score number(3,0), customer_depth number(3,0),
lifecycle_stage number(38,0), credit_score_bin varchar2(100 byte));
After creating the table, you are ready to import the data from Object storage. To do this you will need to use the DBMS_COULD PL/SQL package.
begin
   dbms_cloud.copy_data(
   table_name =>'credit_scoring_100k',
   credential_name =>'ADW_TOKEN',
   file_uri_list => '<url of file in your Object Store bucket, see comment earlier in post>',
   format => json_object('ignoremissingcolumns' value 'true', 'removequotes' value 'true', 'dateformat' value 'YYYY-MM-DD HH24:MI:SS', 'blankasnull' value 'true', 'delimiter' value ',', 'skipheaders' value '1')
);
end;
All done.
You can now query the data and use with Oracle Machine Learning, etc.
[I said at the top of the post there are other methods available. More on this in other posts]
OCI – Making DBaaS Accessible using port 1521
When setting up a Database on Oracle Cloud Infrastructure (OCI) for the first time there are a few pre and post steps to complete before you can access the database using a JDBC type of connect, just like what you have in SQL Developer, or using Python or other similar tools and/or languages.
1. Setup Virtual Cloud Network (VCN)
The first step, when starting off with OCI, is to create a Virtual Cloud Network.
Create a VCN and take all the defaults. But change the radio button shown in the following image.
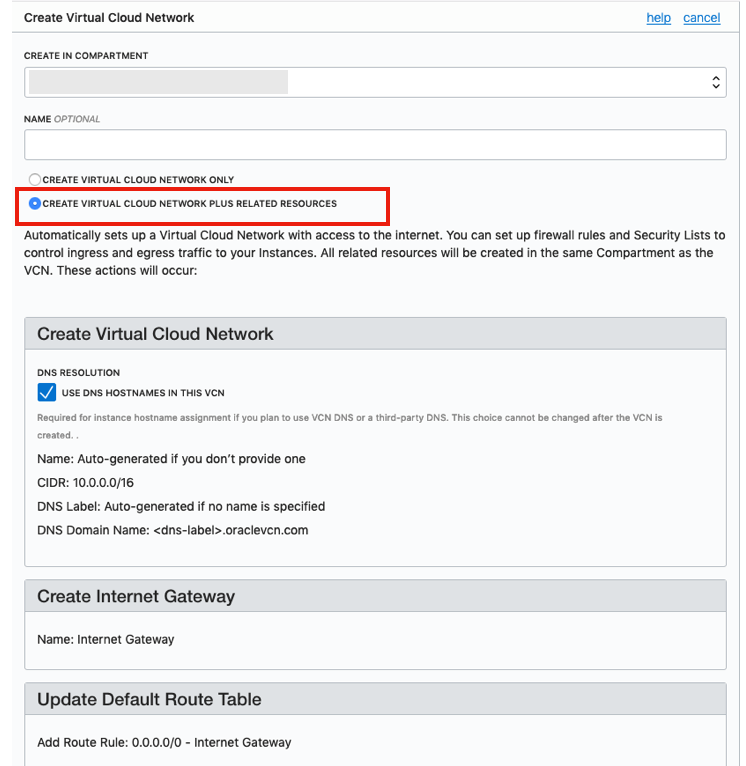
That’s it. We will come back to this later.
2. Create the Oracle Database
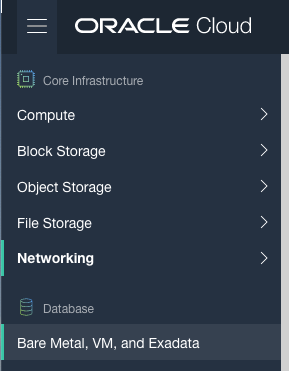
To create the database select ‘Bare Metal, VM and Exadata’ from the menu.
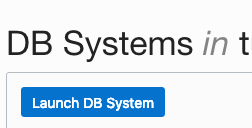
Click on the ‘Launch DB System’ button.
Fill in the details of the Database you want to create and select from the various options from the drop-downs.
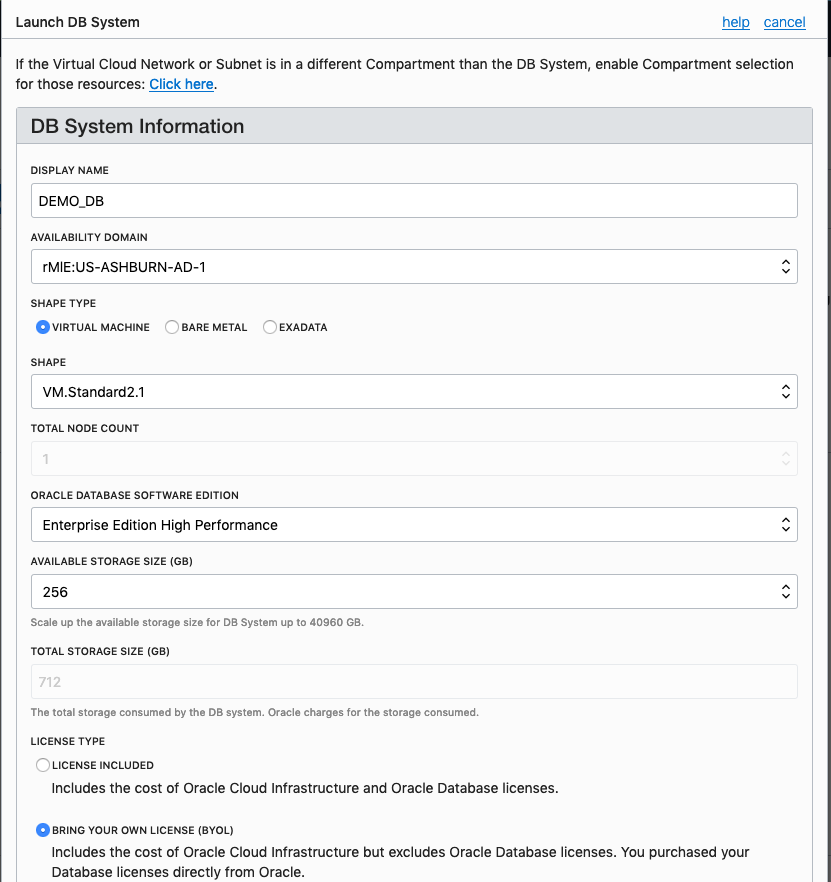
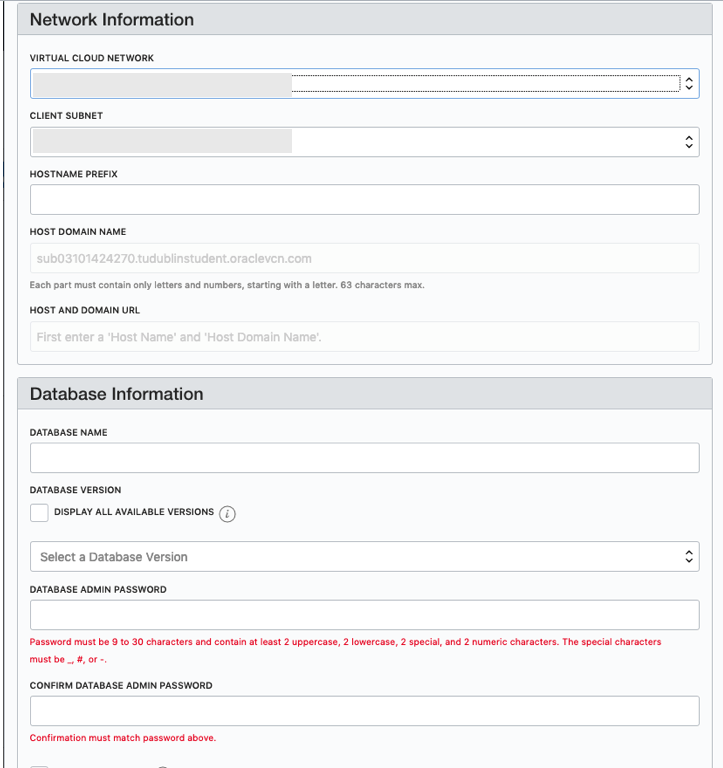
Fill in the details of the VCN you created in the previous set, and give the name of the DB and the Admin password.
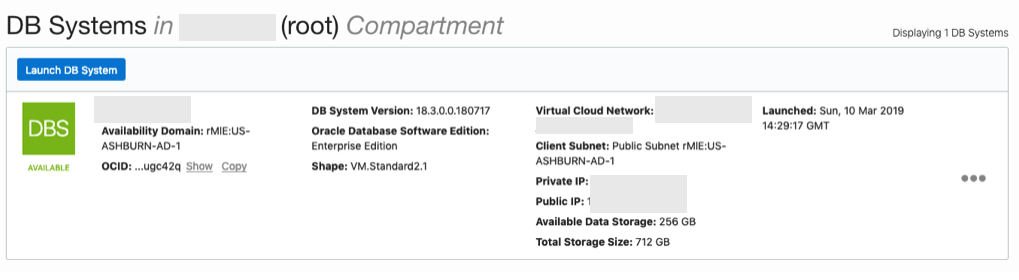
When you are finished everything that is needed, the ‘Launch DB System’ at the bottom of the page will be enabled. After clicking on this botton, the VM will be built and should be ready in a few minutes. When finished you should see something like this.
3. SSH to the Database server
When the DB VM has been created you can now SSH to it. You will need to use the SSH key file used when creating the DB VM. You will need to connect to the opc (operating system user), and from there sudo to the oracle user. For example
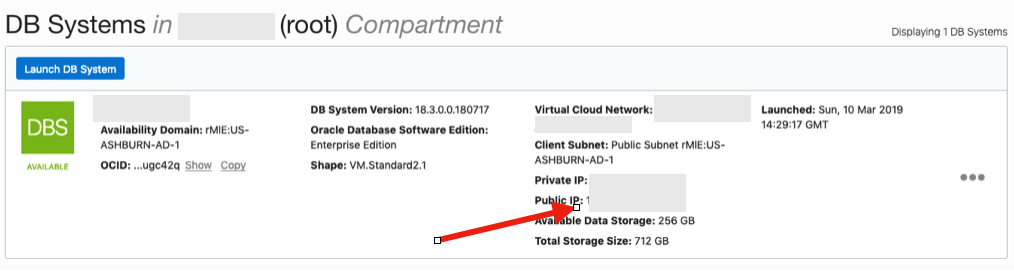
ssh -i <ssh file> opc@<public IP address>
The public IP address can be found with the Database VM details
[opc@tudublins1 ~]$ sudo su - oracle
[oracle@tudublins1 ~]$ . oraenv
ORACLE_SID = [cdb1] ?
The Oracle base has been set to /u01/app/oracle
[oracle@tudublins1 ~]$
[oracle@tudublins1 ~]$ sqlplus / as sysdba

SQL*Plus: Release 18.0.0.0.0 - Production on Wed Mar 13 11:28:05 2019
Version 18.3.0.0.0

Copyright (c) 1982, 2018, Oracle. All rights reserved.


Connected to:
Oracle Database 18c Enterprise Edition Release 18.0.0.0.0 - Production
Version 18.3.0.0.0

SQL> alter session set container = pdb1;

Session altered.

SQL> create user demo_user identified by DEMO_user123##;

User created.

SQL> grant create session to demo_user;

Grant succeeded.

SQL>
4. Open port 1521
To be able to access this with a Basic connection in SQL Developer and most programming languages, we will need to open port 1521 to allow these tools and languages to connect to the database.
To do this go back to the Virtual Cloud Networks section from the menu.
Click into your VCN, that you created earlier. You should see something like the following.

Click on the Security Lists, menu option on the left hand side.
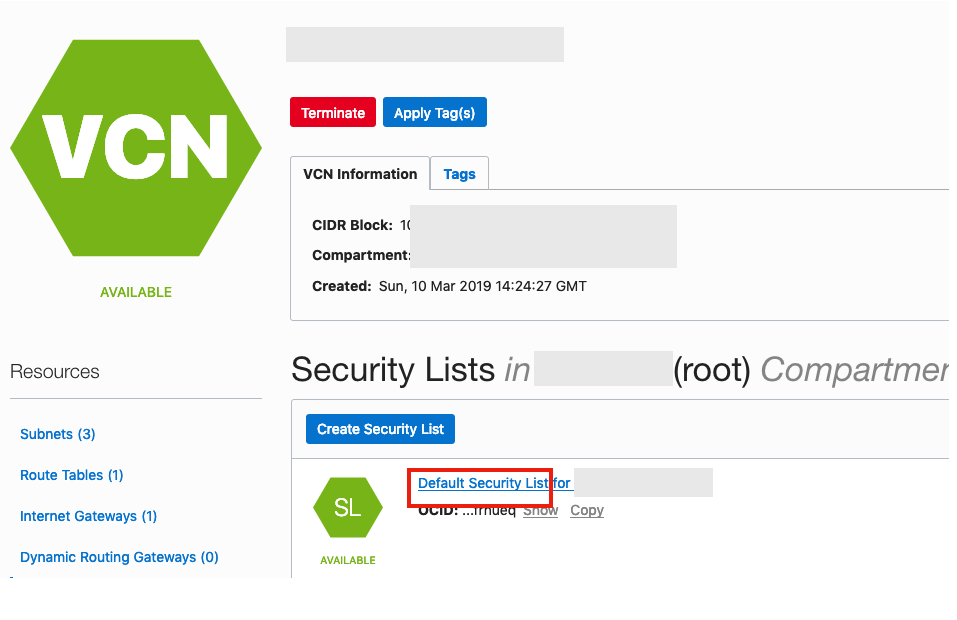 From that screen, click on Default Security List, and then click on the ‘Edit All Rules’ button at the top of the next screen.
Add a new rule to have a ‘Destination Port Range’ set for 1521
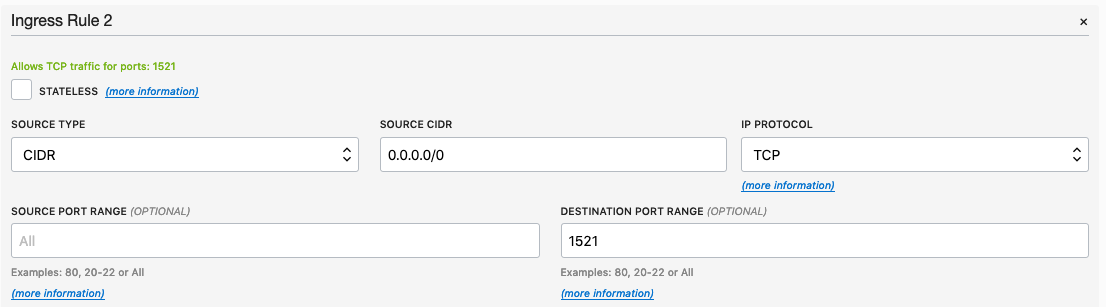
That’s it.
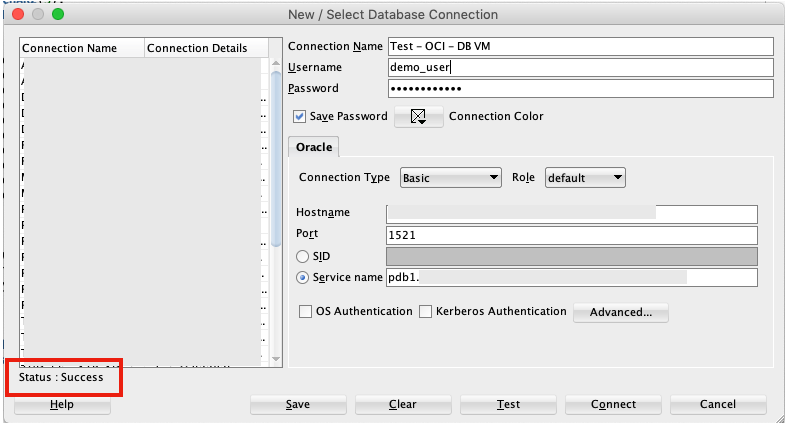
5. Connect to the Database from anywhere
Now you can connect to the OCI Database using a basic SQL Developer Connection.

You must be logged in to post a comment.