
AI Agent
Calling Custom OCI Gen AI Agent using Python
In a previous post, I demonstrated how to create a custom Generative AI Agent on OCI. This GenAI Agent was built using some of Shakespeare’s works. Using the OCI GenAI Agent interface is an easy way to test the Agent and to see how it behaves. Beyond that, it doesn’t have any use as you’ll need to call it using some other language or tool. The most common of these is using Python.
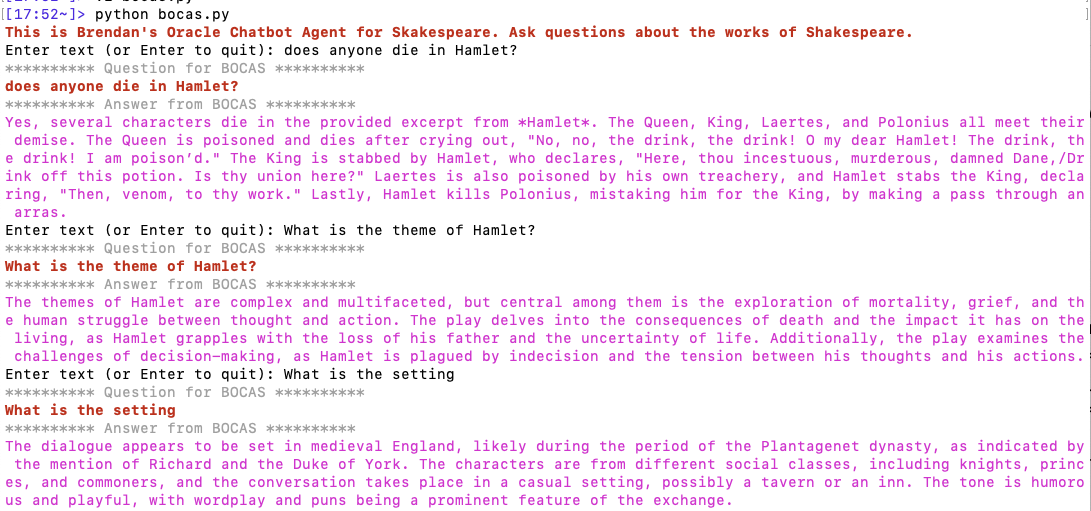
The code below calls my GenAI Agent, which I’ve called BOCAS (Brendan’s Oracle Chat Agent for Shakespeare).
import oci
from oci import generative_ai_agent_runtime
import json
from colorama import Fore, Back, Style
CONFIG_PROFILE = "DEFAULT"
config = oci.config.from_file('~/.oci/config', CONFIG_PROFILE)
#AI Agent service endpoint
SERVICE_EP = <add your Service Endpoint>
AGENT_EP_ID = <add your GenAI Agent Endpoint>
welcome_msg = "This is Brendan's Oracle Chatbot Agent for Shakespeare. Ask questions about the works of Shakespeare."
def gen_Agent_Client():
#Initiate AI Agent runtime client
genai_agent_runtime_client = generative_ai_agent_runtime.GenerativeAiAgentRuntimeClient(config, service_endpoint=SERVICE_EP, retry_strategy=oci.retry.NoneRetryStrategy())
create_session_details = generative_ai_agent_runtime.models.CreateSessionDetails()
create_session_details.display_name = "Welcome to BOCAS"
create_session_details.idle_timeout_in_seconds = 20
create_session_details.description = welcome_msg
return create_session_details, genai_agent_runtime_client
def Quest_Answer(user_question, create_session_details, genai_agent_runtime_client):
#Create a Chat Session for AI Agent
try:
create_session_response = genai_agent_runtime_client.create_session(create_session_details, AGENT_EP_ID)
except:
create_session_details, genai_agent_runtime_client = gen_Agent_Client()
create_session_response = genai_agent_runtime_client.create_session(create_session_details, AGENT_EP_ID)
#Define Chat details and input message/question
session_details = generative_ai_agent_runtime.models.ChatDetails()
session_details.session_id = create_session_response.data.id
session_details.should_stream = False
session_details.user_message = user_question
#Get AI Agent Respose
session_response = genai_agent_runtime_client.chat(agent_endpoint_id=AGENT_EP_ID, chat_details=session_details)
return session_response
print(Style.BRIGHT + Fore.RED + welcome_msg + Style.RESET_ALL)
ses_details, genai_client = gen_Agent_Client()
while True:
question = input("Enter text (or Enter to quit): ")
if not question:
break
chat_response = Quest_Answer(question, ses_details, genai_client)
print(Style.DIM +'********** Question for BOCAS **********')
print(Style.BRIGHT + Fore.RED + question + Style.RESET_ALL)
print(Style.DIM + '********** Answer from BOCAS **********' + Style.RESET_ALL)
print(Fore.MAGENTA + chat_response.data.message.content.text + Style.RESET_ALL)
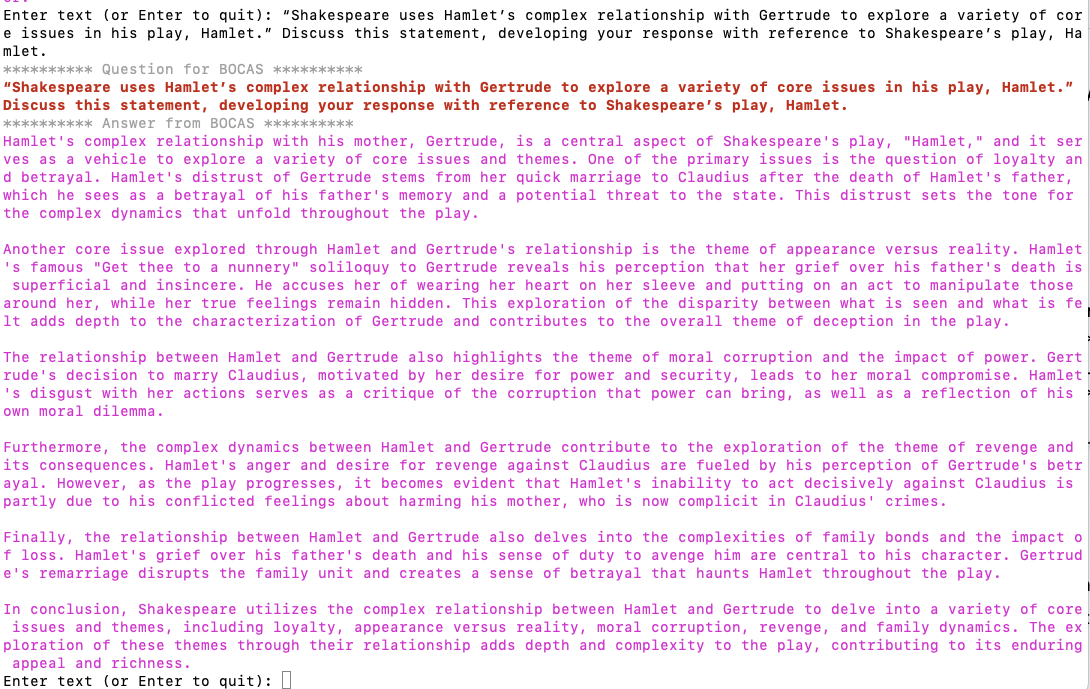
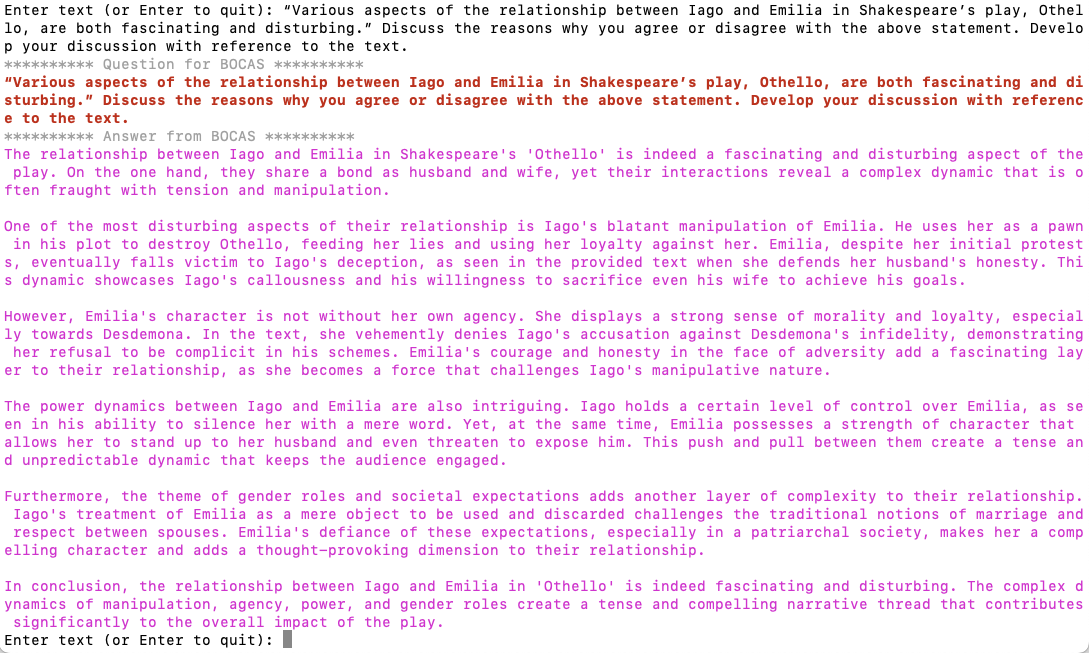
print("*** The End - Exiting BOCAS ***")When the above code is run, it will loop, asking for questions, until no question is added and the ‘Enter’ key is pressed. Here is the output of the BOCAS running for some of the questions I asked in my previous post, along with a few others. These questions are based on the Irish Leaving Certificate English Examination.
Using a Gen AI Agent to answer Leaving Certificate English papers
In a previous post, I walked through the steps needed to create a Gen AI Agent on a data set of documents containing the works of Shakespeare. In this post, I’ll look at how this Gen AI Agent can be used to answer questions from the Irish Leaving Certificate Higher Level English examination papers from the past few years.
For this evaluation, I will start with some basic questions before moving on to questions from the Higher Level English examination from 2022, 2023 and 2024. I’ve pasted the output generated below from chatting with the AI Agent.
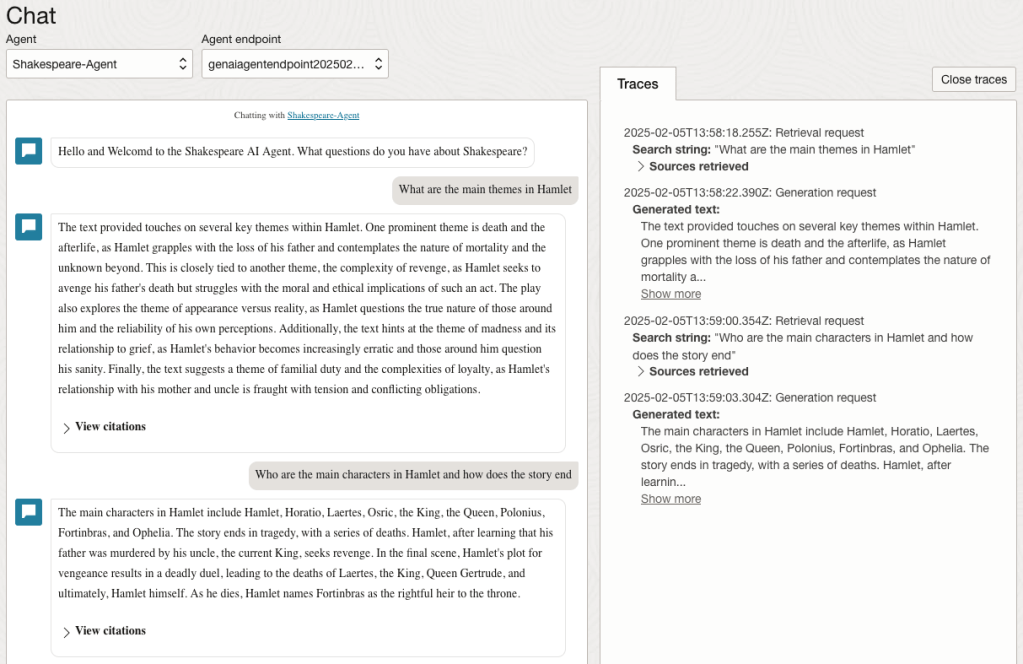
The main texts we will examine will be Othello, McBeth and Hamlett. Let’s start with some basic questions about Hamlet.
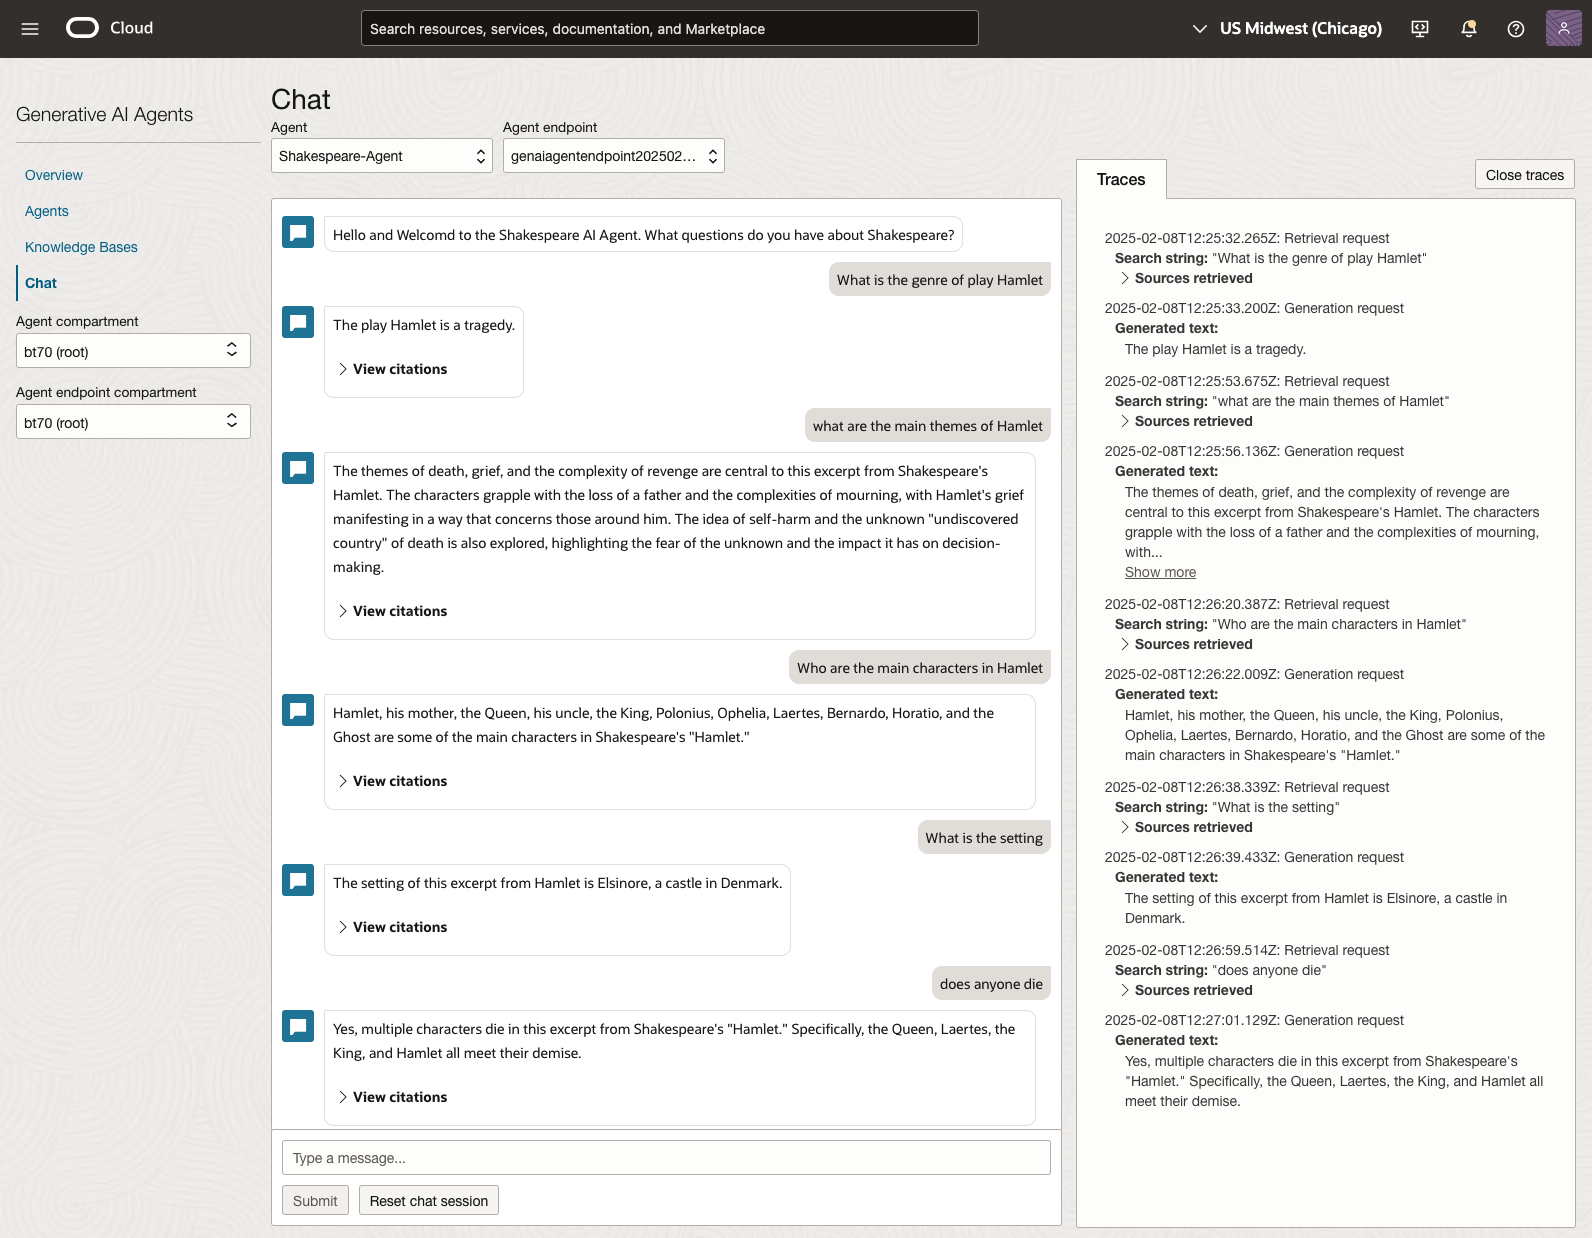
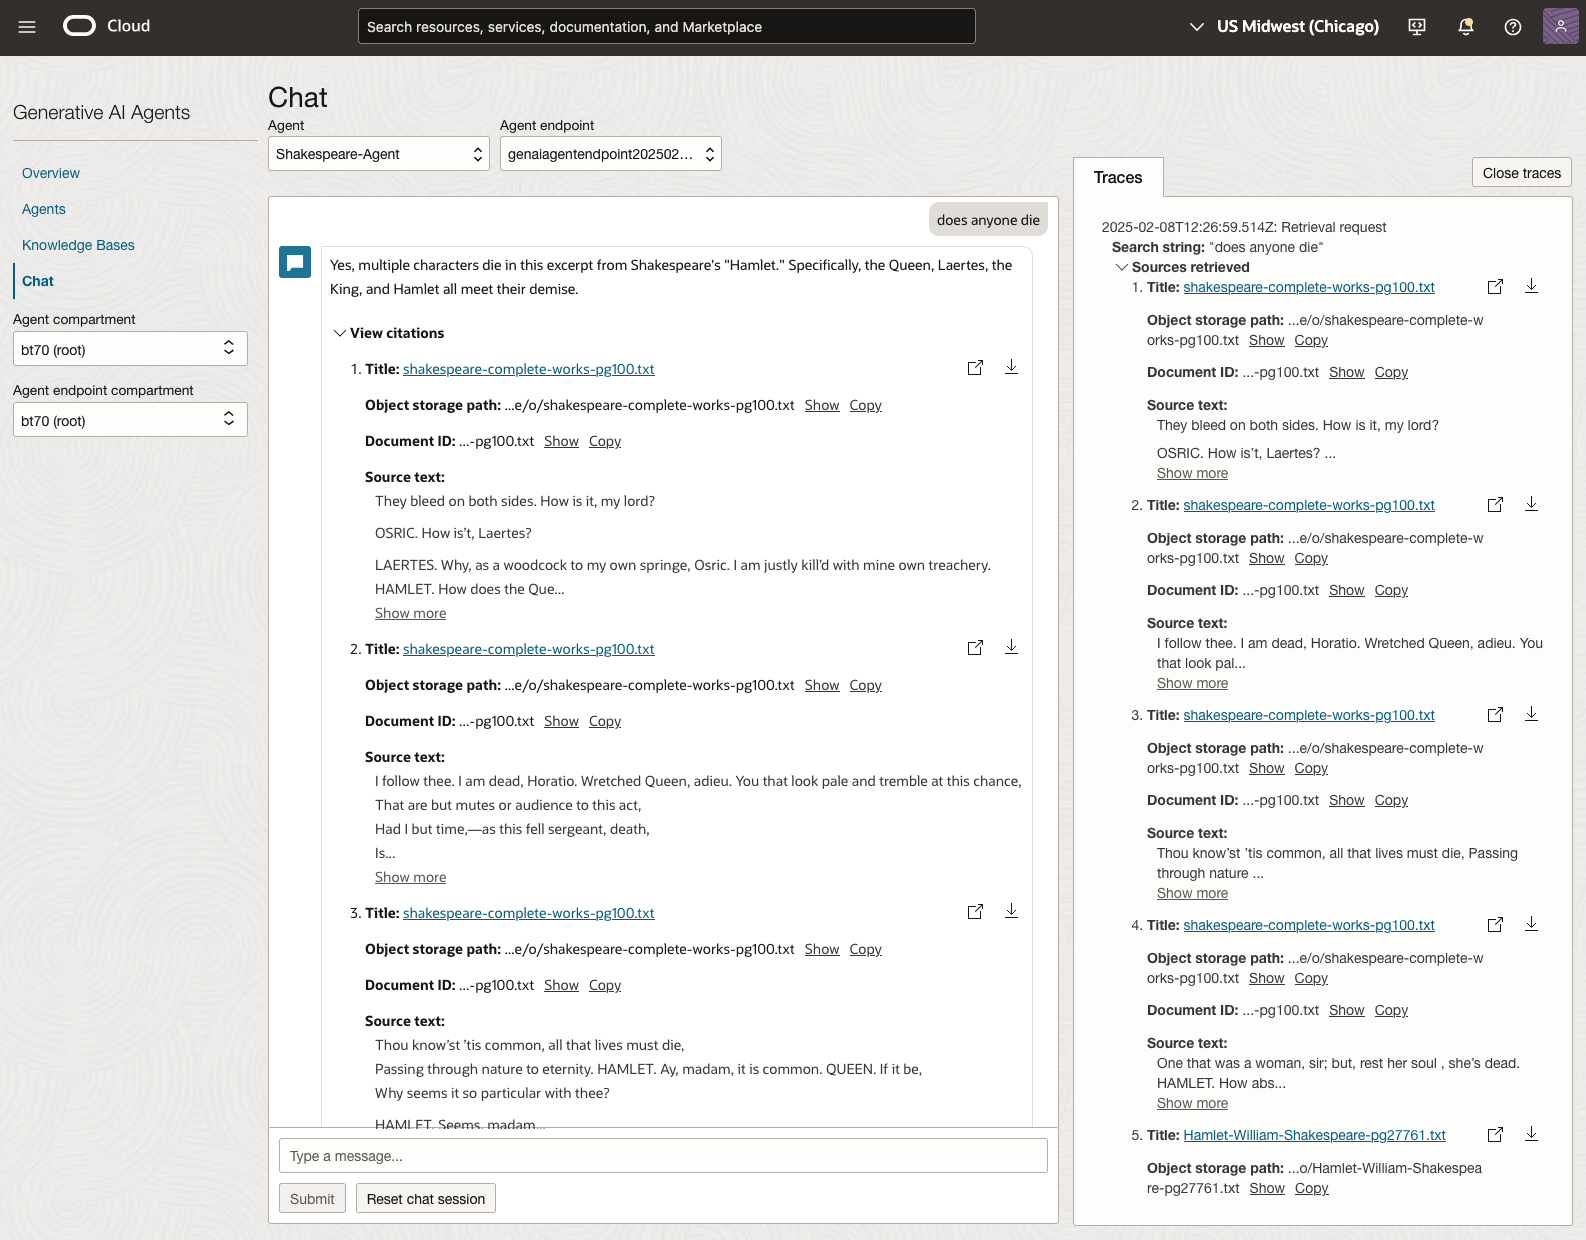
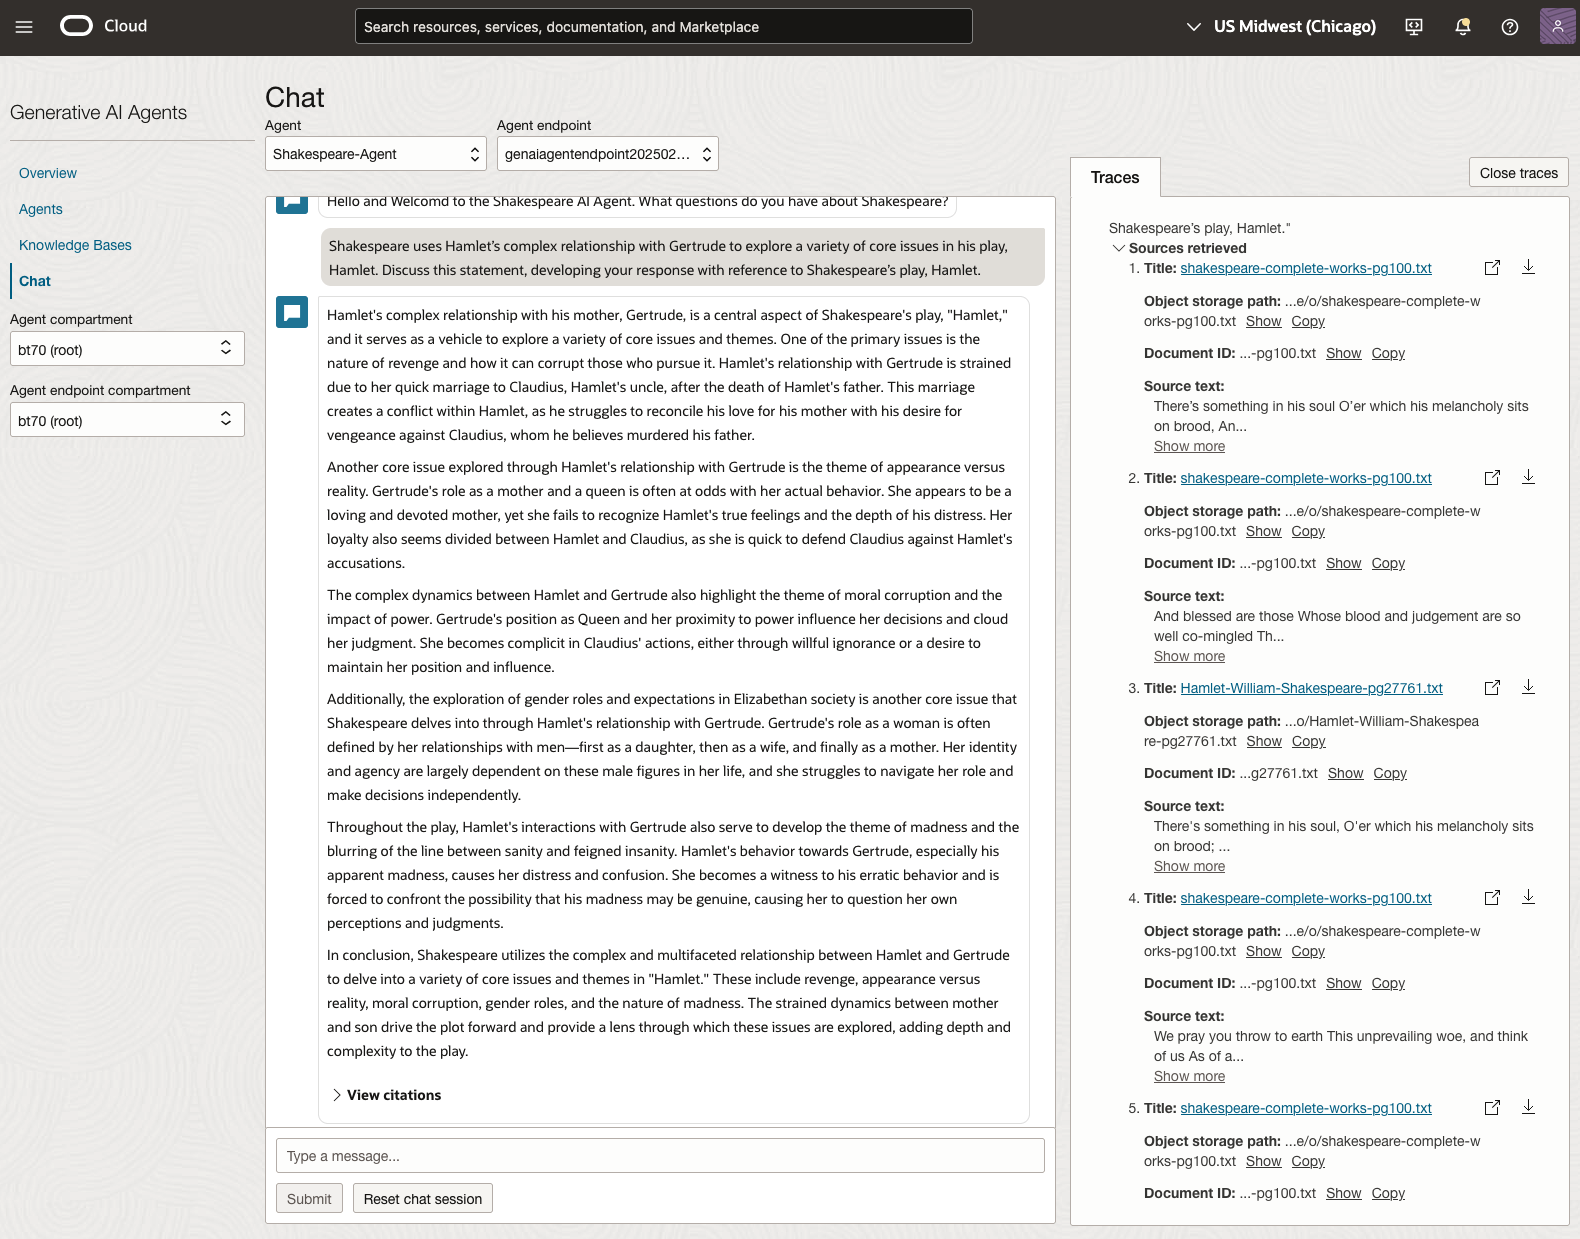
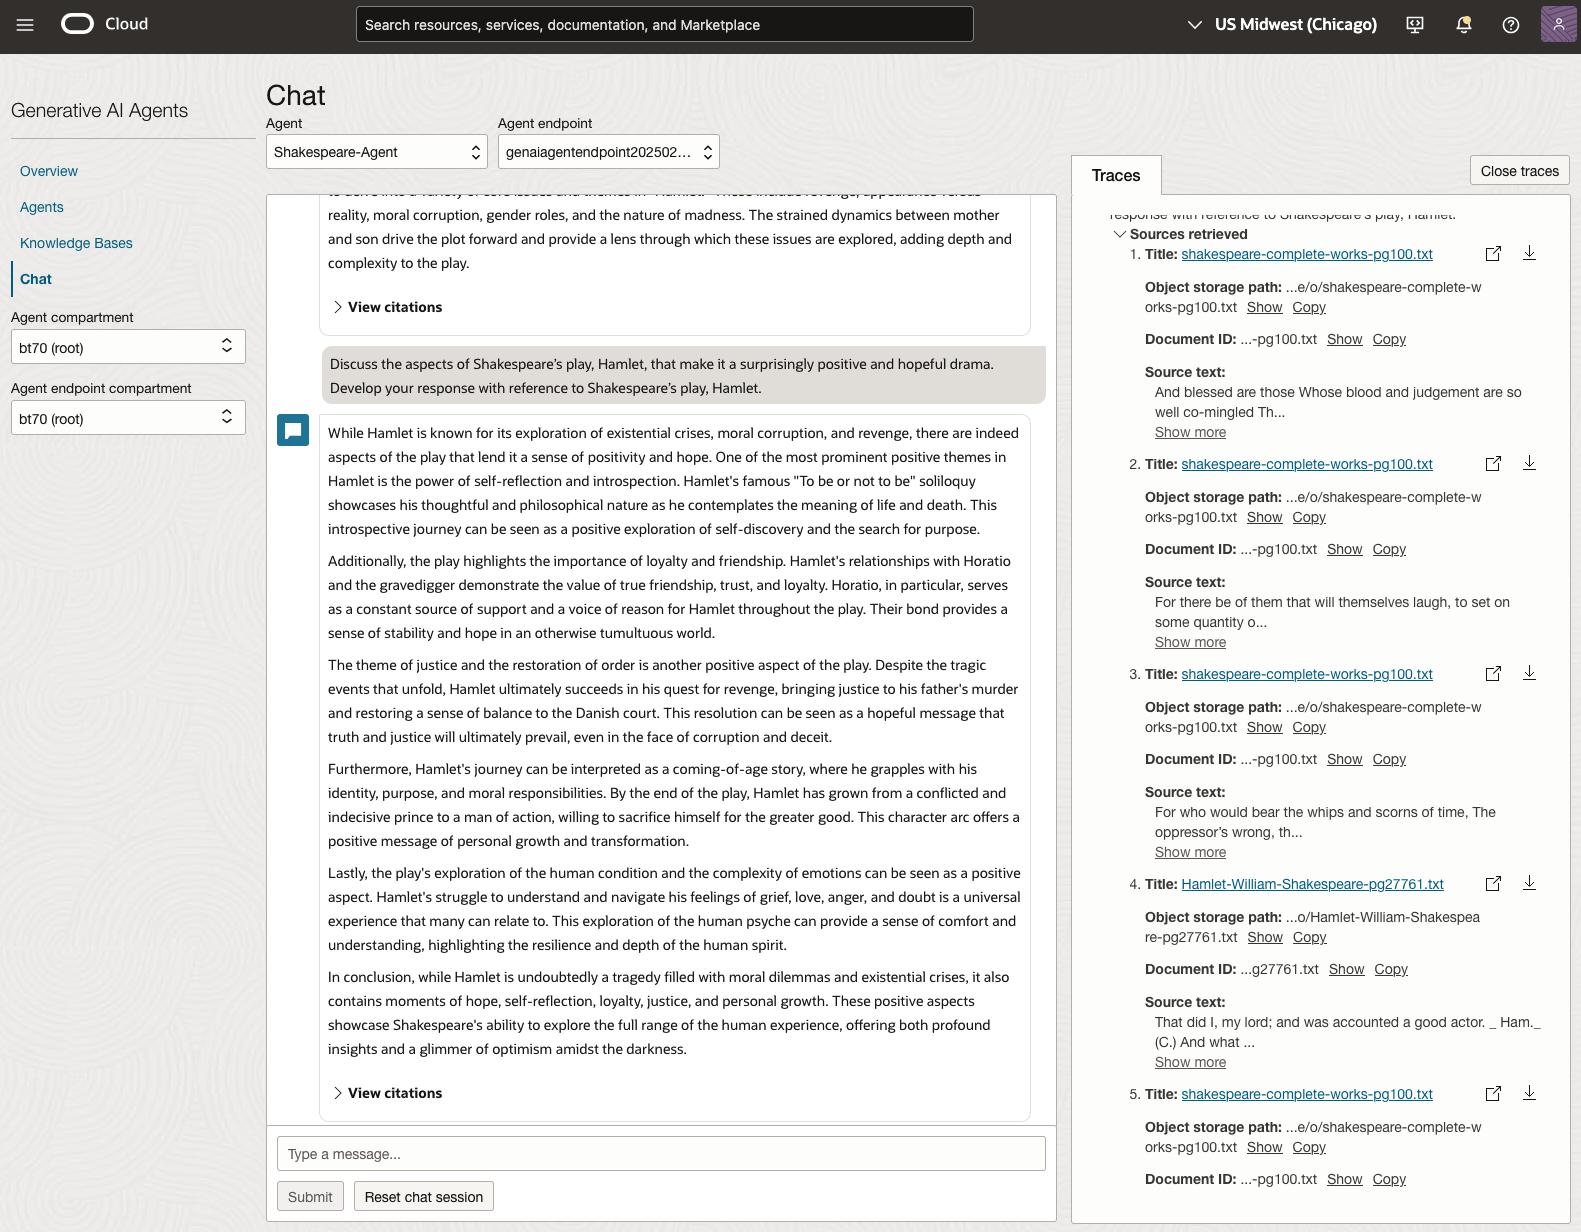
We can look at the sources used by the AI Agent to generate their answer, by clicking on View citations or Sources retrieved on the right-hand side panel.
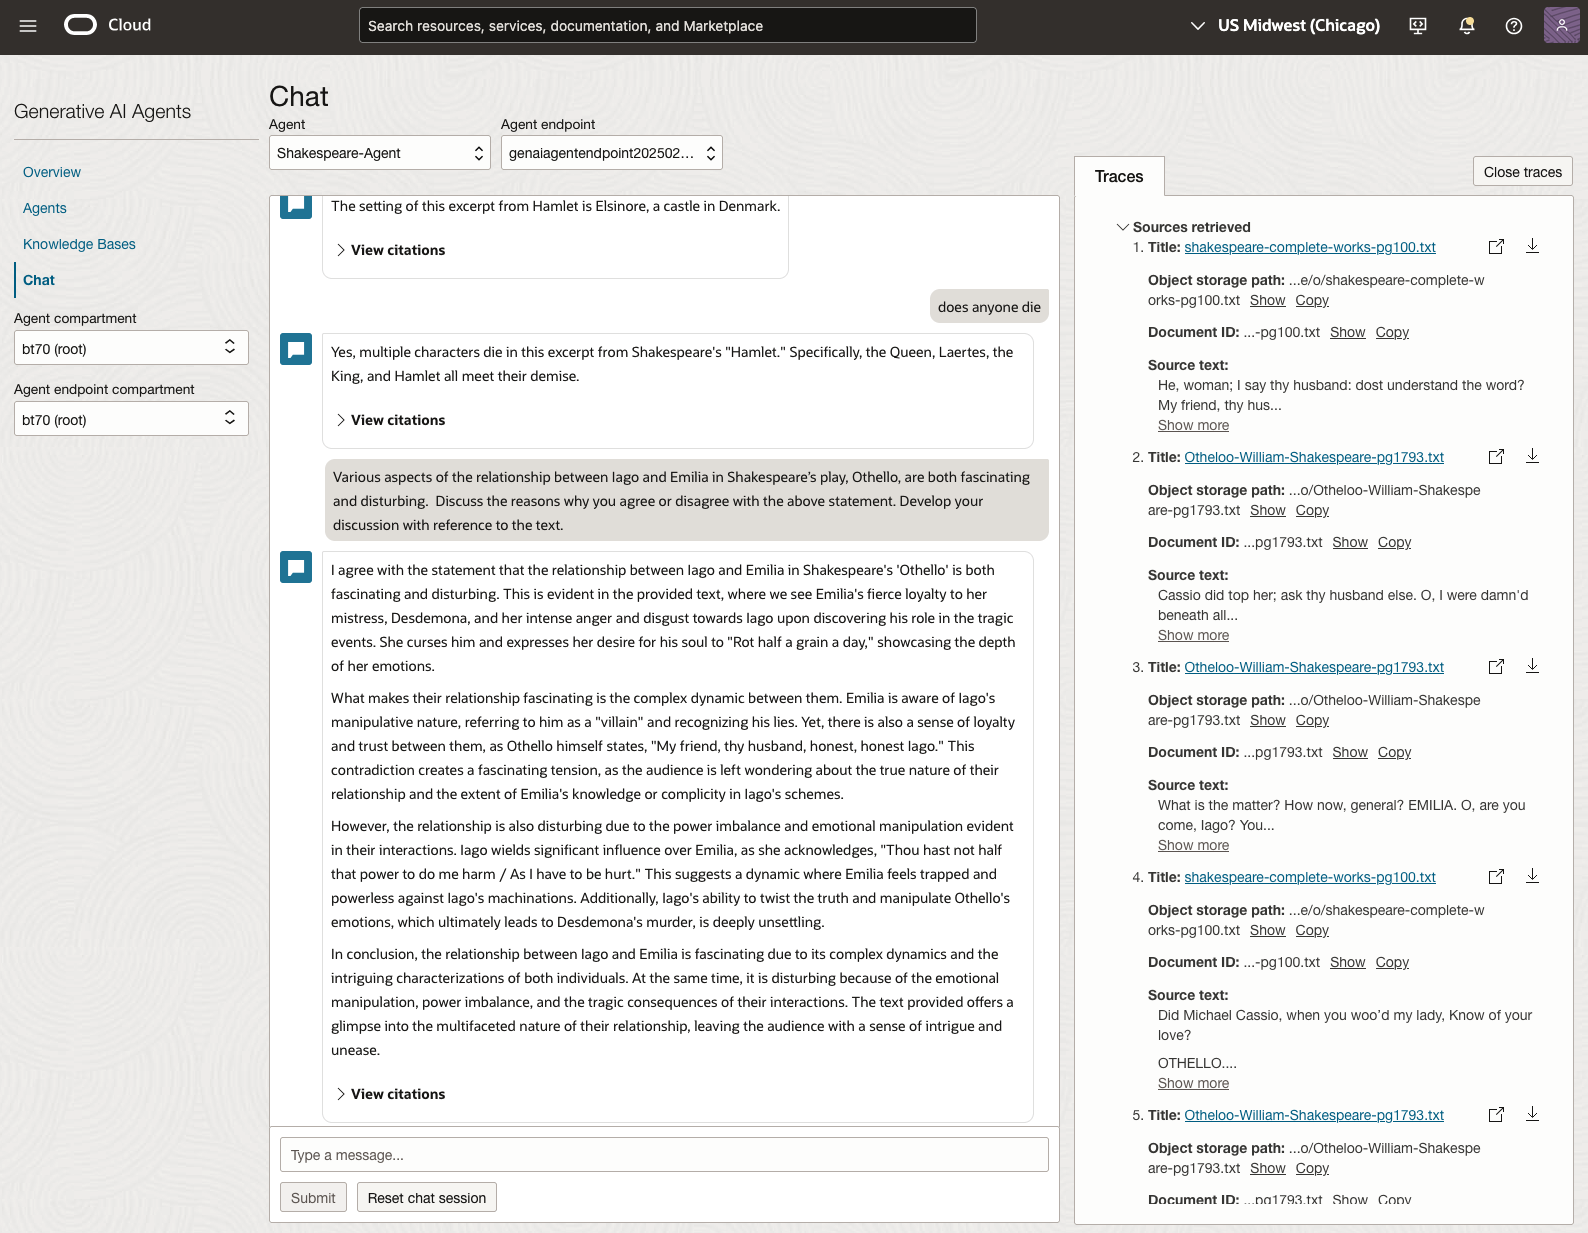
Let’s have a look at the 2022 English examination question on Othello. Students typically have the option of answering one out of two questions.

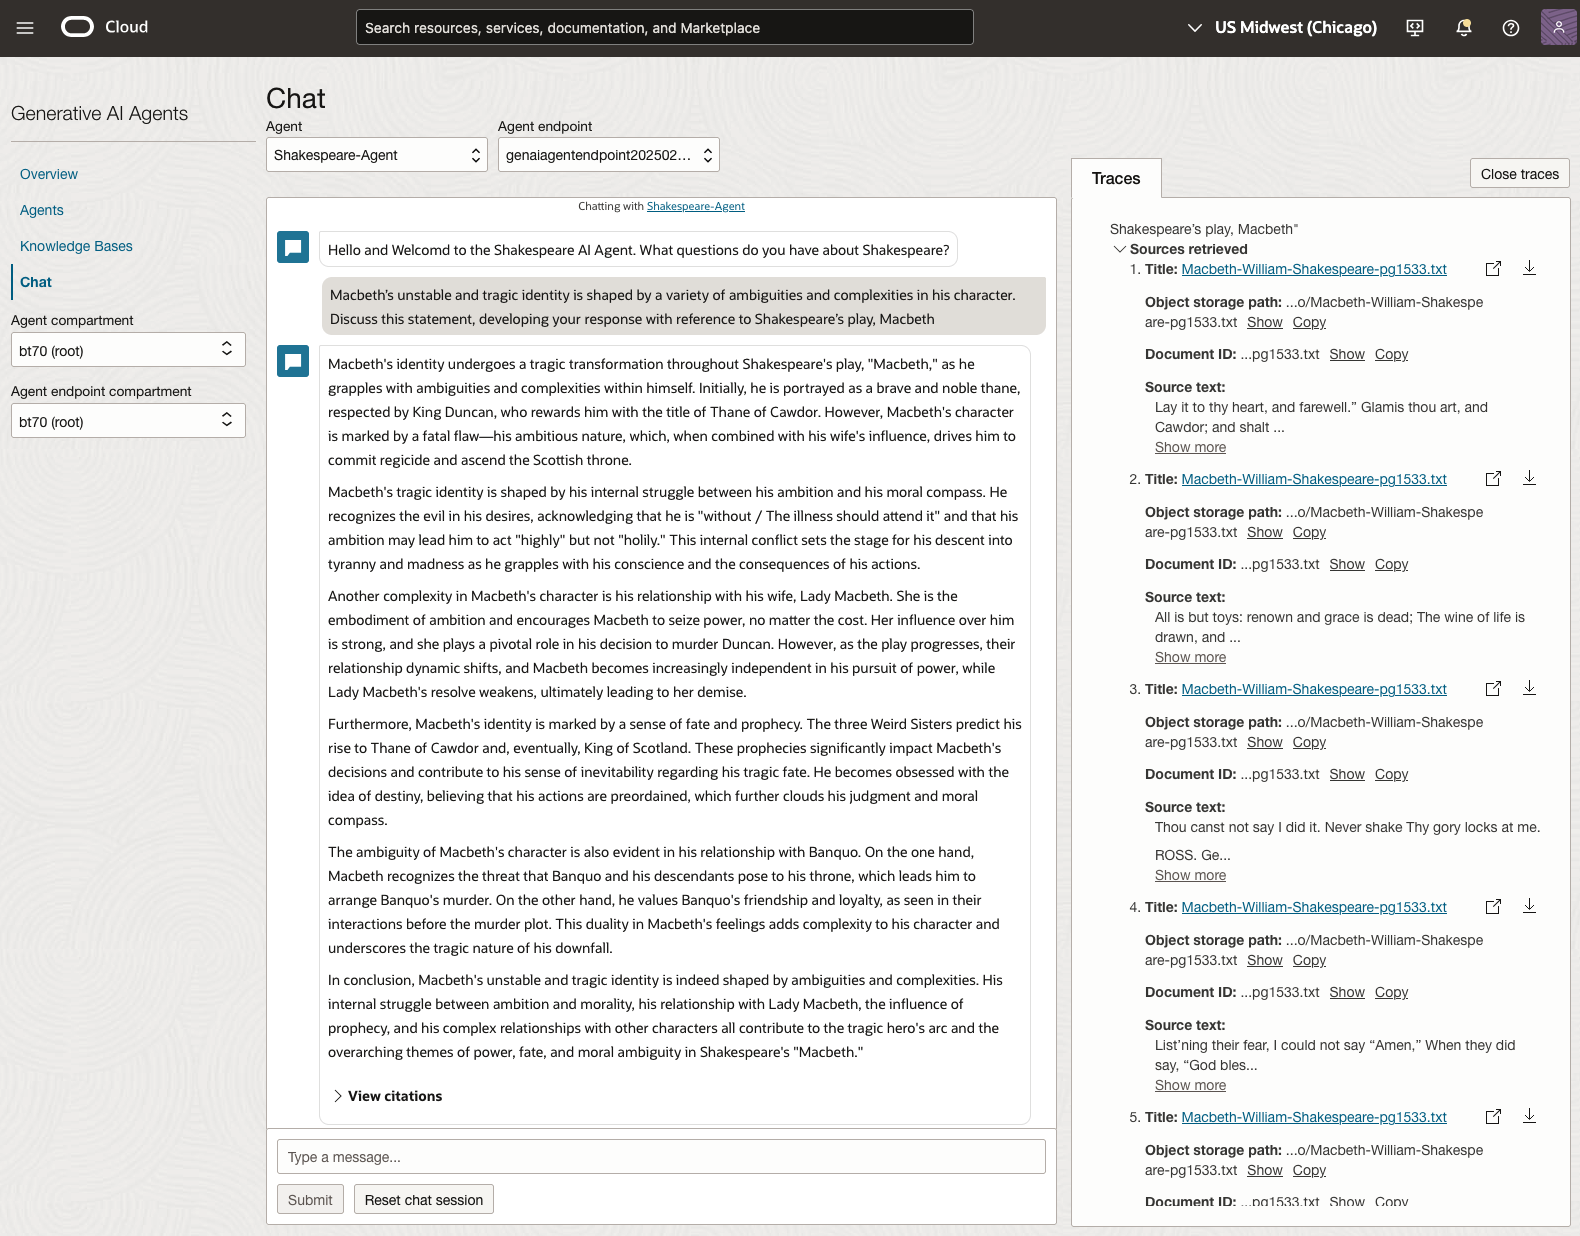
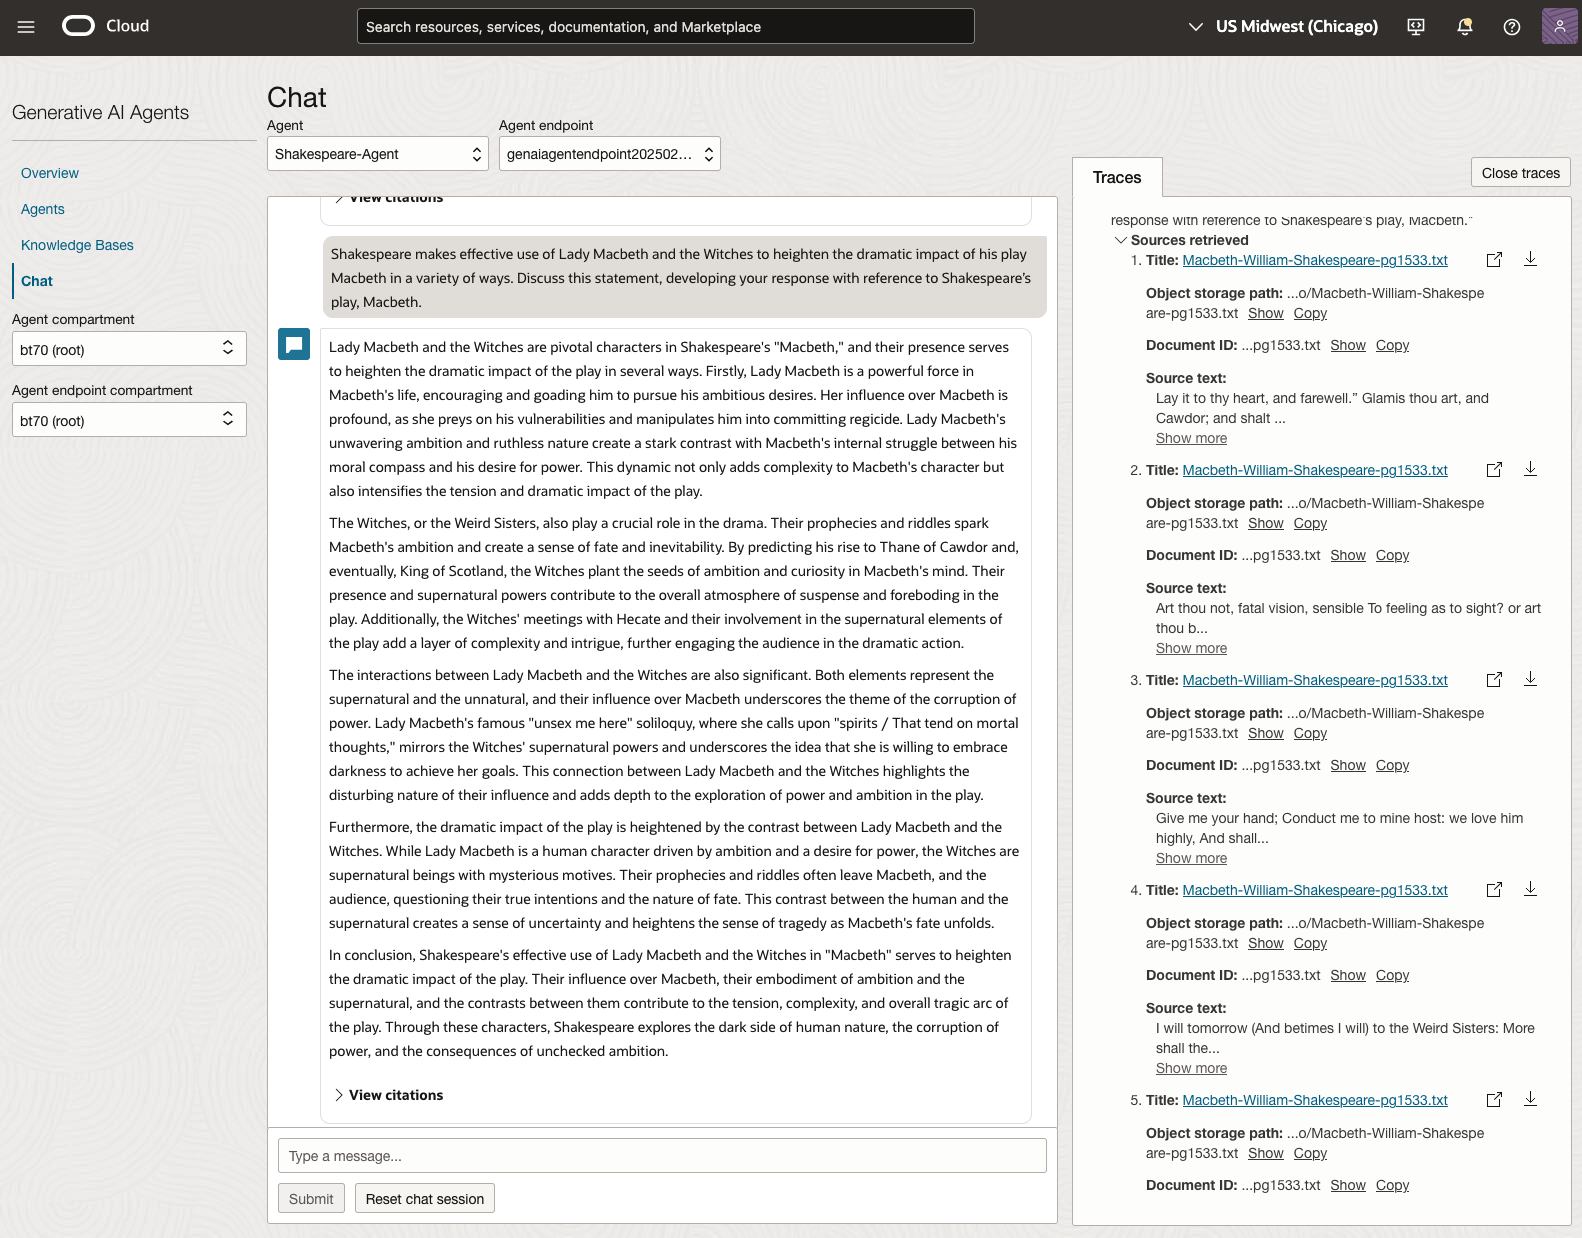
In 2023, the Shakespeare text was McBeth.
In 2024, the Shakespeare text was Hamlet.
We can see from the above questions, that the AI Agent was able to generate possible answers. As a learning and study resource, it can be difficult to determine the correctness of these answers. Currently, there does seem to be evidence that students typically believe what the AI is generating. But the real question is, should they? Why the AI Agent can give a believable answer for students to memorise, but how good are the answers really? How many marks would they get for these answers? What kind of details are missing from these answers?
To help me answer these questions I enlisted the help of some previous Students who took these English examinations, along with two English teachers who teach higher-level English classes. The students all achieved a H1 grade for English. This is the highest grade possible, where a H1 means they achieved between 90-100%. The feedback from the students and teachers was largely positive. One teacher remarked the answers, to some of the questions, were surprisingly good. When asked about what grade or what percentage range these answers would achieve, again the students and teachers were largely in agreement, with a range between 60-75%. The students tended to give slightly higher marks than the teachers. They were then asked about what was missing from these answers, as in what was needed to get more marks. Again the responses from both the students and teachers were similar, with details of higher-level reasoning, understanding of interpersonal themes, irony, imagery, symbolism, etc were missing.
How to Create an Oracle Gen AI Agent
In this post, I’ll walk you through the steps needed to create a Gen AI Agent on Oracle Cloud. We have seen lots of solutions offered by my different providers for Gen AI Agents. This post focuses on just what is available on Oracle Cloud. You can create a Gen AI Agent manually. However, testing and fine-tuning based on various chunking strategies can take some time. With the automated options available on Oracle Cloud, you don’t have to worry about chunking. It handles all the steps automatically for you. This means you need to be careful when using it. Allocate some time for testing to ensure it meets your requirements. The steps below point out some checkboxes. You need to check them to ensure you generate a more complete knowledge base and outcome.
For my example scenario, I’m going to build a Gen AI Agent for some of the works by Shakespeare. I got the text of several plays from the Gutenberg Project website. The process for creating the Gen AI Agent is:

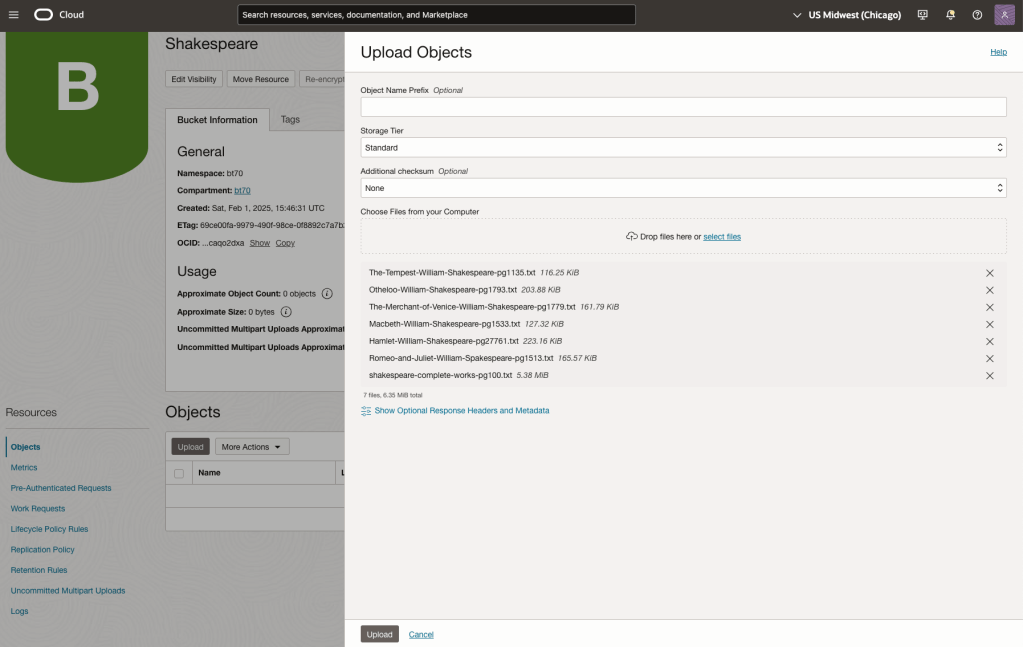
Step-1 Load Files to a Bucket on OCI
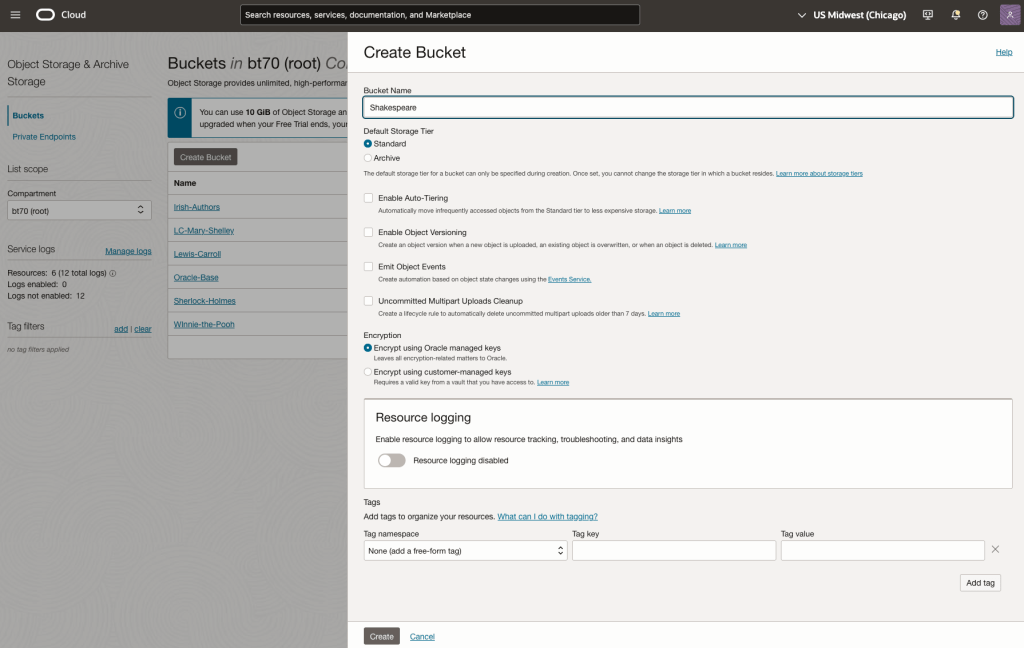
Create a bucket called Shakespeare.
Load the files from your computer into the Bucket. These files were obtained from the Gutenberg Project site.
Step-2 Define a Data Source (documents you want to use) & Create a Knowledge Base
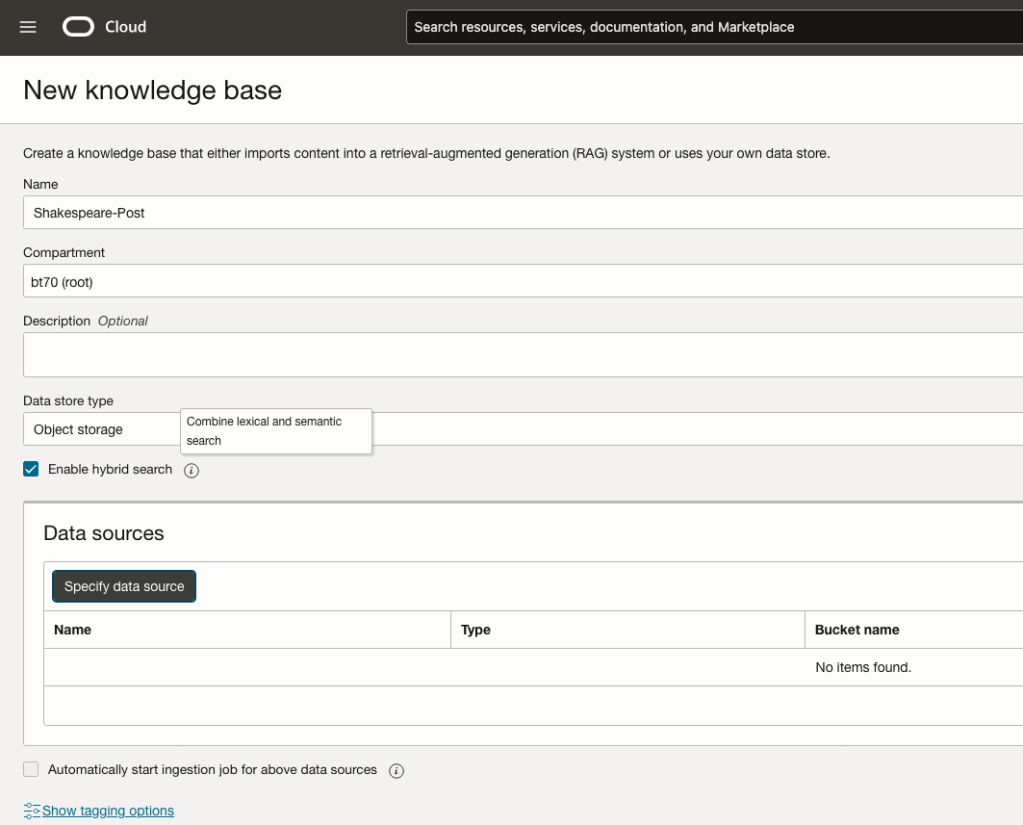
Click on Create Knowledge Base and give it a name ‘Shakespeare’.
Check the ‘Enable Hybrid Search’. checkbox. This will enable both lexical and semantic search. [this is Important]
Click on ‘Specify Data Source’
Select the Bucket from the drop-down list (Shakespeare bucket).
Check the ‘Enable multi-modal parsing’ checkbox.
Select the files to use or check the ‘Select all in bucket’
Click Create.

The Knowledge Base will be created. The files in the bucket will be parsed, and structured for search by the AI Agent. This step can take a few minutes as it needs to process all the files. This depends on the number of files to process, their format and the size of the contents in each file.
Step-3 Create Agent
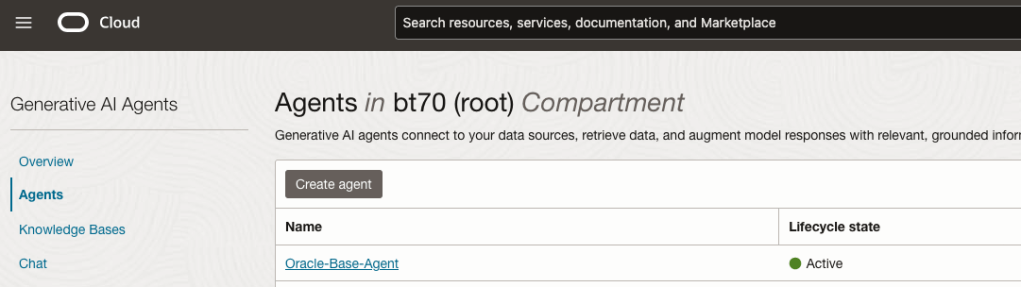
Go back to the main Gen AI menu and select Agent and then Create Agent.
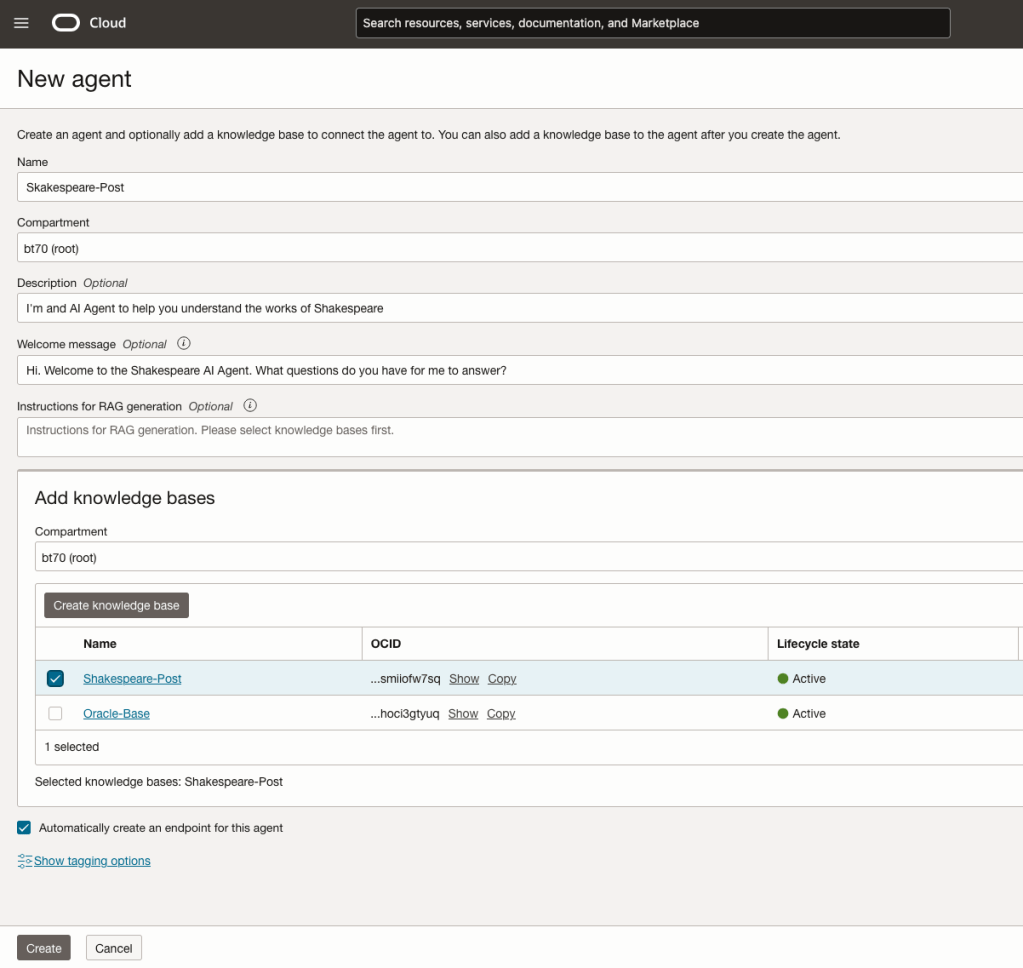
You can enter the following details:
- Name of the Agent
- Some descriptive information
- A Welcome message for people using the Agent
- Select the Knowledge Base from the list.
The checkbox for creating Endpoints should be checked.
Click Create.
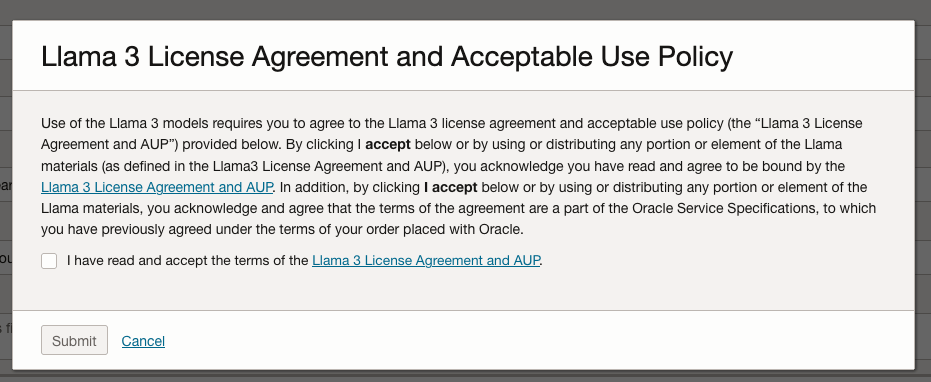
A pop-up window will appear asking you to agree to the Llama 3 License. Check this checkbox and click Submit.
After the agent has been created, check the status of the endpoints. These generally take a little longer to create, and you need these before you can test the Agent using the Chatbot.
Step-4 Test using Chatbot
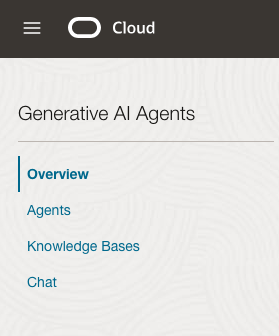
After verifying the endpoints have been created, you can open a Chatbot by clicking on ‘Chat’ from the menu on the left-hand side of the screen.
Select the name of the ‘Agent’ from the drop-down list e.g. Shakespeare-Post.
Select an end-point for the Agent.
After these have been selected you will see the ‘Welcome’ message. This was defined when creating the Agent.
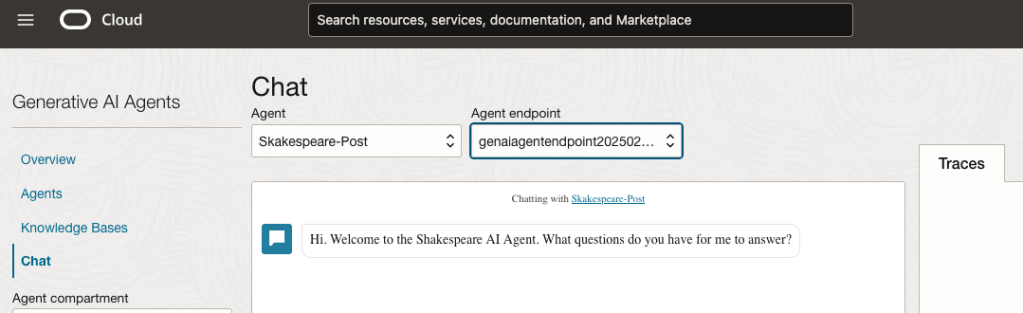
Here are a couple of examples of querying the works by Shakespeare.
In addition to giving a response to the questions, the Chatbot also lists the sections of the underlying documents and passages from those documents used to form the response/answer.
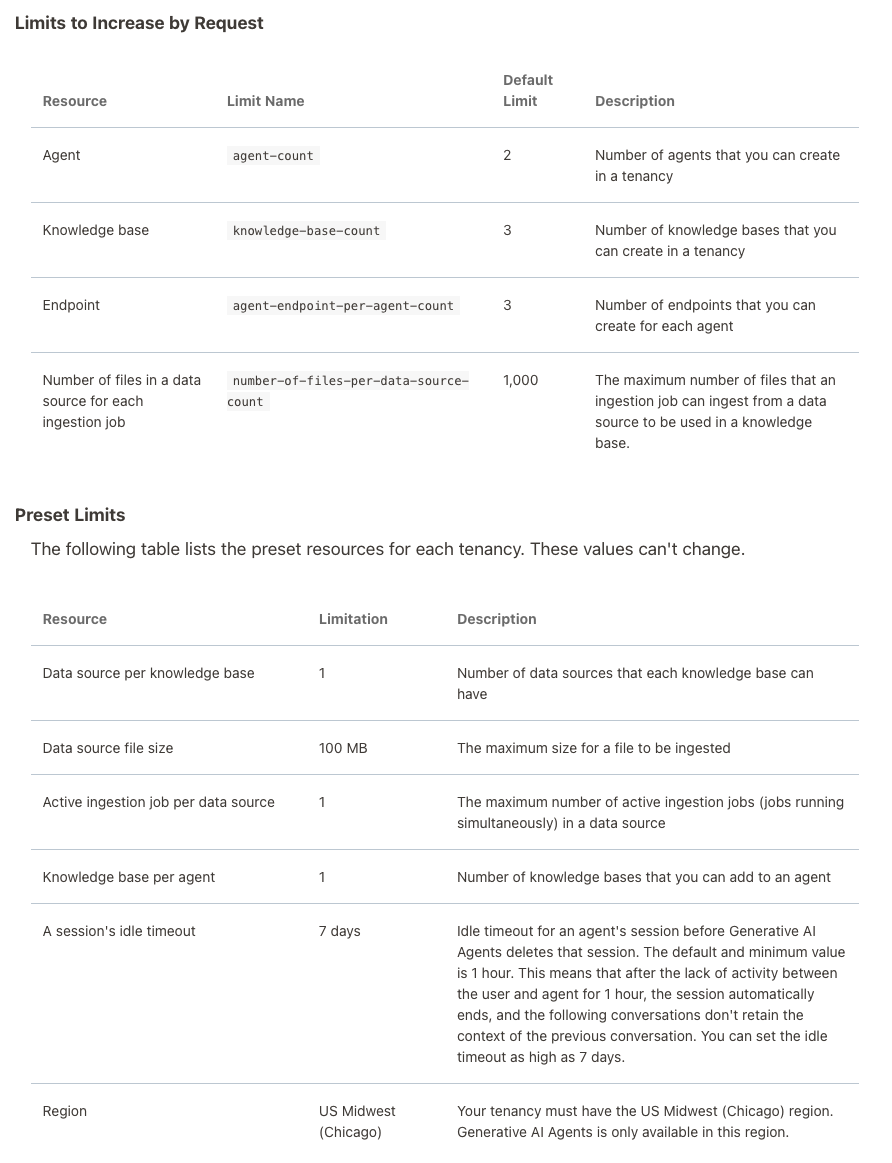
When creating Gen AI Agents, you need to be careful of two things. The first is the Cloud Region. Gen AI Agents are only available in certain Cloud Regions. If they aren’t available in your Region, you’ll need to request access to one of those or setup a new OCI account based in one of those regions. The second thing is the Resource Limits. At the time of writing this post, the following was allowed. Check out the documentation for more details. You might need to request that these limits be increased.
I’ll have another post showing how you can run the Chatbot on your computer or VM as a webpage.

You must be logged in to post a comment.