
OCI Data Science – Create a Project & Notebook, and Explore the Interface
In my previous blog post I went through the steps of setting up OCI to allow you to access OCI Data Science. Those steps showed the setup and configuration for your Data Science Team.

In this post I will walk through the steps necessary to create an OCI Data Science Project and Notebook, and will then Explore the basic Notebook environment.
1 – Create a Project
From the main menu on the Oracle Cloud home page select Data Science -> Projects from the menu.

Select the appropriate Compartment in the drop-down list on the left hand side of the screen. In my previous blog post I created a separate Compartment for my Data Science work and team. Then click on the Create Projects button.
 Enter a name for your project. I called this project, ‘DS-Demo-Project’. Click Create button.

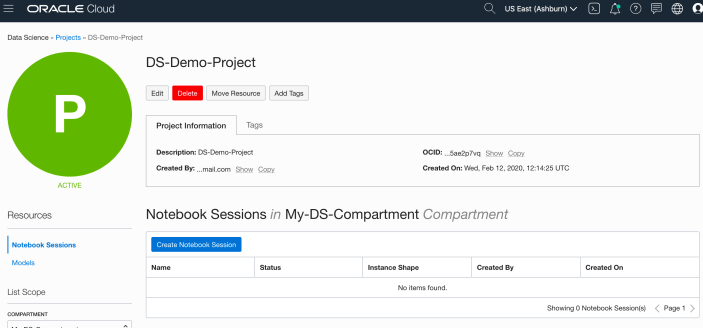
That’s the Project created.
2 – Create a Notebook
After creating a project (see above) you can not create one or many Notebook Sessions.
To create a Notebook Session click on the Create Notebook Session button (see the above image). This will create a VM to contain your notebook and associated work. Just like all VM in Oracle Cloud, they come in various different shapes. These can be adjusted at a later time to scale up and then back down based on the work you will be performing.
The following example creates a Notebook Session using the basic VM shape. I call the Notebook ‘DS-Demo-Notebook’. I also set the Block Storage size to 50G, which is the minimum value. The VNC details have been defaulted to those assigned to the Compartment. Click Create button at the bottom of the page.

The Notebook Session VM will be created. This might take a few minutes. When created you will see a screen like the following.
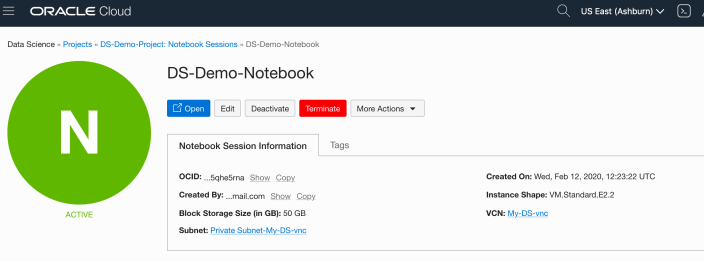
3 – Open the Notebook
After completing the above steps you can now open the Notebook Session in your browser. Either click on the Open button (see above image), or copy the link and share with your data science team.
Important: There are a few important considerations when using the Notebooks. While the session is running you will be paying for it, even if the session got terminated at the browser or you lost connect. To manage costs, you may need to stop the Notebook session. More details on this in a later post.
After clicking on the Open button, a new browser tab will open and will ask you to log-in.

After logging in you will see your Notebook.

4 – Explore the Notebook Environment
The Notebook comes pre-loaded with lots of goodies.
The menu on the left-hand side provides a directory with lots of sample Notebooks, access to the block storage and a sample getting started Notebook.

When you are ready to create your own Notebook you can click on the icon for that.

Or if you already have a Notebook, created elsewhere, you can load that into your OCI Data Science environment.

The uploaded Notebook will appear in the list on the left-hand side of the screen.
One thought on “OCI Data Science – Create a Project & Notebook, and Explore the Interface”
Comments are closed.

February 18, 2020 at 8:40 am
[…] I found out about this new services reading Brendan Tierney articles:– OCI Data Science – Initial Setup and Configuration– OCI Data Science – Create a Project & Notebook, and Explore the Interface […]
LikeLike