
OCI Data Science
OCI Data Science – Create a Project & Notebook, and Explore the Interface
In my previous blog post I went through the steps of setting up OCI to allow you to access OCI Data Science. Those steps showed the setup and configuration for your Data Science Team.

In this post I will walk through the steps necessary to create an OCI Data Science Project and Notebook, and will then Explore the basic Notebook environment.
1 – Create a Project
From the main menu on the Oracle Cloud home page select Data Science -> Projects from the menu.

Select the appropriate Compartment in the drop-down list on the left hand side of the screen. In my previous blog post I created a separate Compartment for my Data Science work and team. Then click on the Create Projects button.
 Enter a name for your project. I called this project, ‘DS-Demo-Project’. Click Create button.

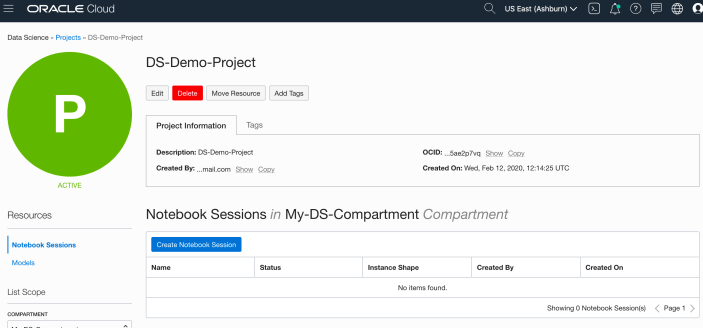
That’s the Project created.
2 – Create a Notebook
After creating a project (see above) you can not create one or many Notebook Sessions.
To create a Notebook Session click on the Create Notebook Session button (see the above image). This will create a VM to contain your notebook and associated work. Just like all VM in Oracle Cloud, they come in various different shapes. These can be adjusted at a later time to scale up and then back down based on the work you will be performing.
The following example creates a Notebook Session using the basic VM shape. I call the Notebook ‘DS-Demo-Notebook’. I also set the Block Storage size to 50G, which is the minimum value. The VNC details have been defaulted to those assigned to the Compartment. Click Create button at the bottom of the page.

The Notebook Session VM will be created. This might take a few minutes. When created you will see a screen like the following.
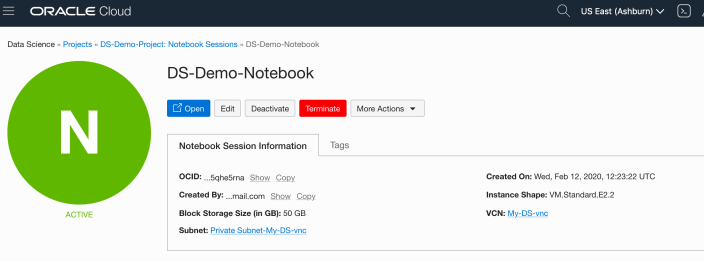
3 – Open the Notebook
After completing the above steps you can now open the Notebook Session in your browser. Either click on the Open button (see above image), or copy the link and share with your data science team.
Important: There are a few important considerations when using the Notebooks. While the session is running you will be paying for it, even if the session got terminated at the browser or you lost connect. To manage costs, you may need to stop the Notebook session. More details on this in a later post.
After clicking on the Open button, a new browser tab will open and will ask you to log-in.

After logging in you will see your Notebook.

4 – Explore the Notebook Environment
The Notebook comes pre-loaded with lots of goodies.
The menu on the left-hand side provides a directory with lots of sample Notebooks, access to the block storage and a sample getting started Notebook.

When you are ready to create your own Notebook you can click on the icon for that.

Or if you already have a Notebook, created elsewhere, you can load that into your OCI Data Science environment.

The uploaded Notebook will appear in the list on the left-hand side of the screen.
OCI Data Science – Initial Setup and Configuration
After a very, very, very long wait (18+ months) Oracle OCI Data Science platform is now available.
But before you jump straight into using OCI Data Science, there is a little bit of setup required for your Cloud Tenancy. There is the easy simple approach and then there is the slightly more involved approach. These are
- Simple approach. Assuming you are just going to use the root tenancy and compartment, you just need to setup a new policy to enable the use of the OCI Data Science services. This assuming you have your VNC configuration complete with NAT etc. This can be done by creating a policy with the following policy statement. After creating this you can proceed with creating your first notebook in OCI Data Science.
allow service datascience to use virtual-network-family in tenancy

- Slightly more complicated approach. When you get into having a team based approach you will need to create some additional Oracle Cloud components to manage them and what resources are allocated to them. This involved creating Compartments, allocating users, VNCs, Policies etc. The following instructions brings you through these steps
IMPORTANT: After creating a Compartment or some of the other things listed below, and they are not displayed in the expected drop-down lists etc, then either refresh your screen or log-out and log back in again!
1. Create a Group for your Data Science Team & Add Users
The first step involves creating a Group to ‘group’ the various users who will be using the OCI Data Science services.
Go to Governance and Administration ->Identity and click on Groups.
Enter some basic descriptive information. I called my Group, ‘my-data-scientists’.


Now click on your Group in the list of Groups and add the users to the group.
You may need to create the accounts for the various users.

2. Create a Compartment for your Data Science work
Now create a new Compartment to own the network resources and the Data Science resources.
Go to Governance and Administration ->Identity and click on Compartments.
Enter some basic descriptive information. I’ve called my compartment, ‘My-DS-Compartment’.


3. Create Network for your Data Science work
Creating and setting up the VNC can be a little bit of fun. You can do it the manual way whereby you setup and configure everything. Or you can use the wizard to do this. I;m going to show the wizard approach below.
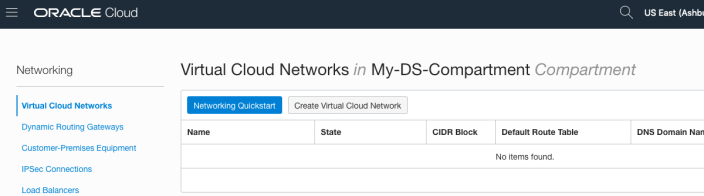
But the first thing you need to do is to select the Compartment the VNC will belong to. Select this from the drop-down list on the left hand side of the Virtual Cloud Network page. If your compartment is not listed, then log-out and log-in!


To use the wizard approach click the Networking QuickStart button.
Select the option ‘VCN with Internet Connectivity and click Start Workflow, as you will want to connect to it and to allow the service to connect to other cloud services.

I called my VNC ‘My-DS-vnc’ and took the default settings. Then click the Next button.

The next screen shows a summary of what will be done. Click the Create button, and all of these networking components will be created.

All done with creating the VNC.
4. Create required Policies enable OCI Data Science for your Compartment
There are three policies needed to allocated the necessary resources to the various components we have just created. To create these go to Governance and Administration ->Identity and click on Policies.
Select your Compartment from the drop-down list. This should be ‘My-DS-Compartment’, then click on Create Policy.
The first policy allocates a group to a compartment for the Data Science services. I called this policy, ‘DS-Manage-Access’.
allow group My-data-scientists to manage data-science-family in compartment My-DS-Compartment
The next policy is to give the Data Science users access to the network resources. I called this policy, ‘DS-Manage-Network’.
allow group My-data-scientists to use virtual-network-family in compartment My-DS-Compartment
And the third policy is to give Data Science service access to the network resources. I called this policy, ‘DS-Network-Access’.
allow service datascience to use virtual-network-family in compartment My-DS-Compartment
Job Done 🙂
You are now setup to run the OCI Data Science service. Check out my Blog Post on creating your first OCI Data Science Notebook and exploring what is available in this Notebook.

You must be logged in to post a comment.